
Shop Sign progress part 2
See previous post here: Part 1
Before I talk about the sign, I want to mention that I think there are still a couple open slots in my wood carving class this Saturday April 12, 2014 at Rockler Woodworking Store in Northgate (Seattle, WA). Â Â It’s a two day class, and I start with the basics and work up to more complex stuff.
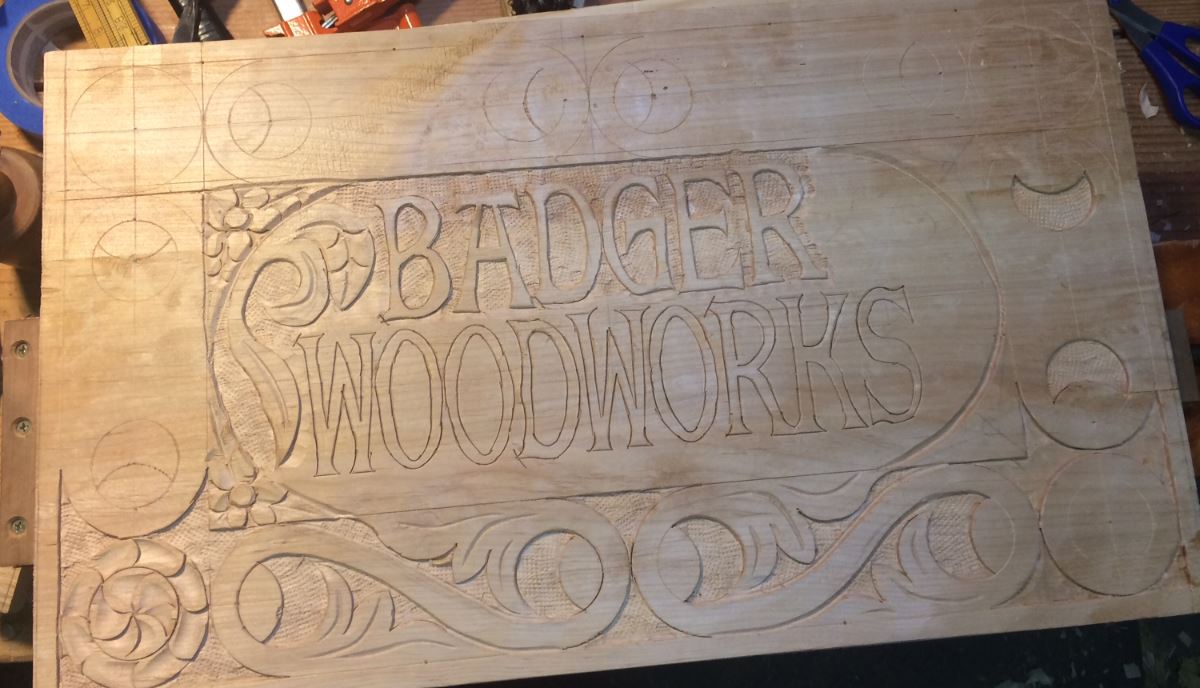
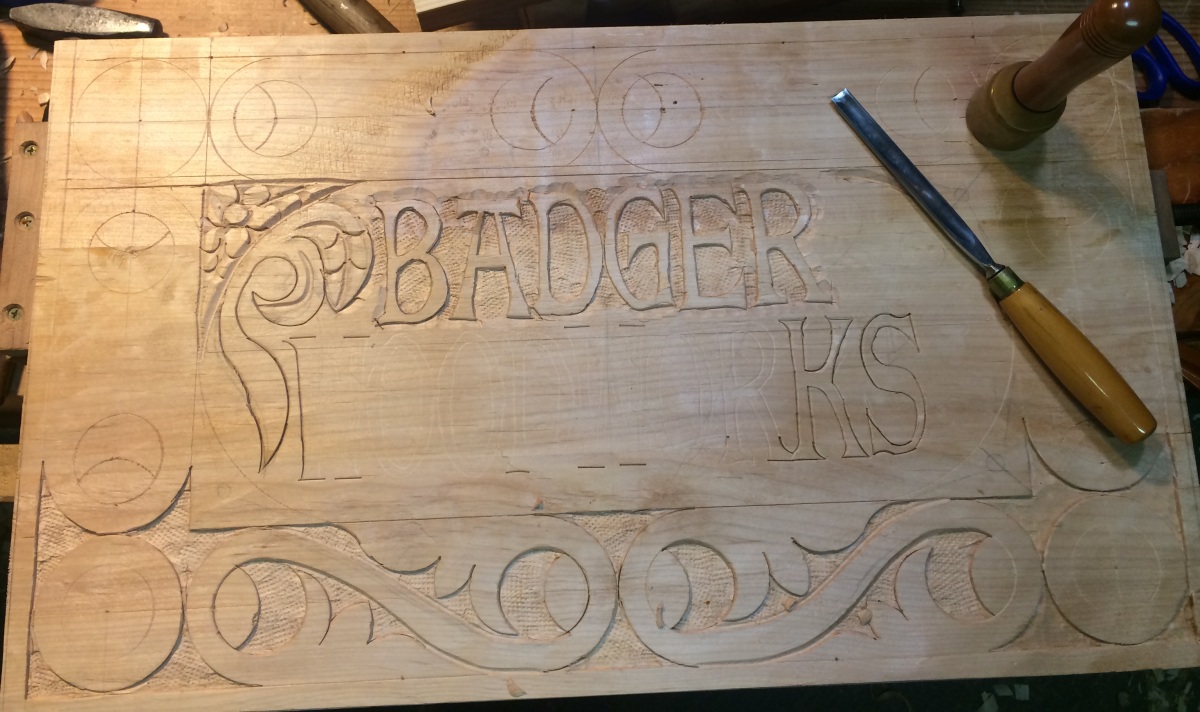
Letters outlined
Tonight I finished outlining the letters, and finished most of the major detail carving for the center area. Â Things I learned… Â Super glue is handy to have on hand, and thin letters in soft-ish wood is not necessarily a good idea. Â And yes those things are related.
The Alder is nice to carve, but it’s a bit soft and the thin legs on the letter had occasional problems when I slipped or pried even slightly off course. Â I had to replace four different chunks, and the S could not totally be repaired. Â Regardless I’m pretty happy with the result, and I’m going to be calling this a “Prototype” anyway.
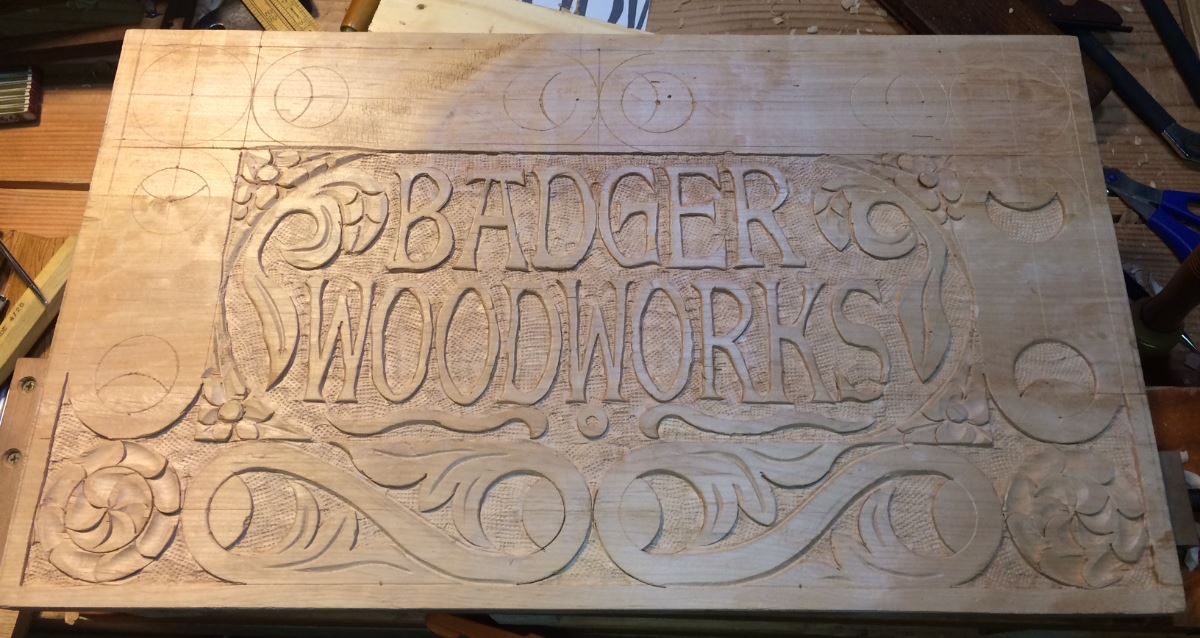
Majority of the letter work done.
I just need to finish up two of the round bits, and four S scrolls around the out side. Â A coat of Shellac should make it pop a bit, but over all it’s been a fun experiment. I definitely need to pay more attention to the general widths of the letter parts.
The outline of the letters was actually easier than I anticipated, and I did the bulk of the work with three chisels.
Flat chisel for straight areas.
Small medium curved gouge for the finials and bases on the letters, and some of the tighter inside curves.
Small flat-ish gouge (probably a #3) for outline the gentler curves.
I ended up using a fair number of other chisels because I had them, but I think I could have done almost everything with those three. Â It’s a case of using what you have to fit the outline you want.
I’m actually considering offering a one day class on letters both V-chisel incised Times New Roman, and a bolder font done like my sign above for bigger stuff. Â After I get through the relief carving class, I’ll see what Rockler wants to do in that area.
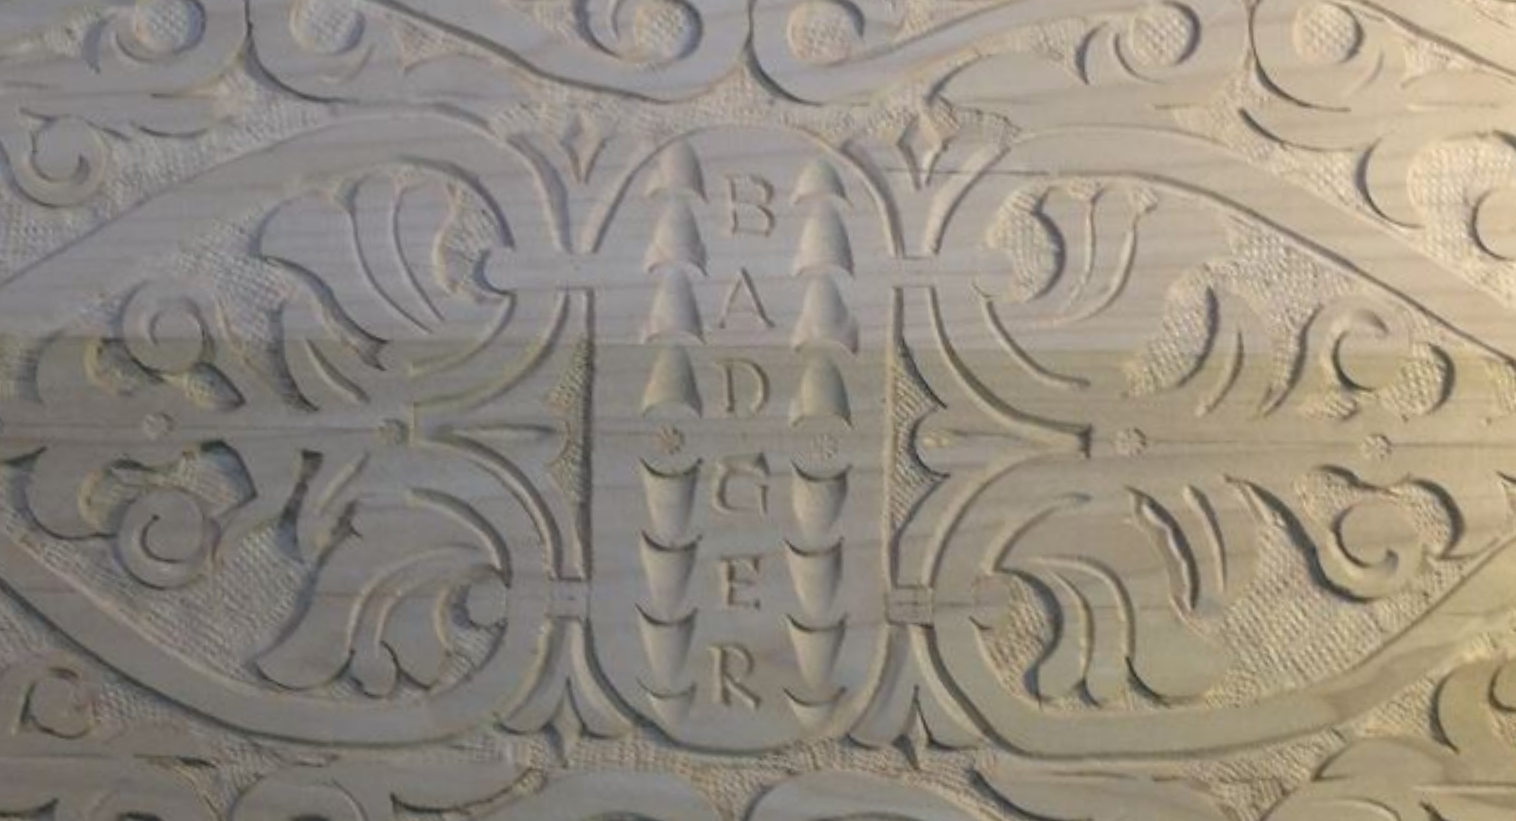
Badger
Shop Sign progress part 1
As I was preparing to teach my upcoming carving class, I realized I didn’t have a sign. Â So, I thought I’d warm up my carving muscles for my class and demo, and make a sign for Badger Woodworks at the same time.
I started with some the Alder I’ve posted about before which I’m running a little low on, and glued three sections together to make a larger panel. Â I used Hide Glue and a bunch of clamps, and it worked like a charm. Â The wood has some funky grain in a few spots, but otherwise seems carve-able.
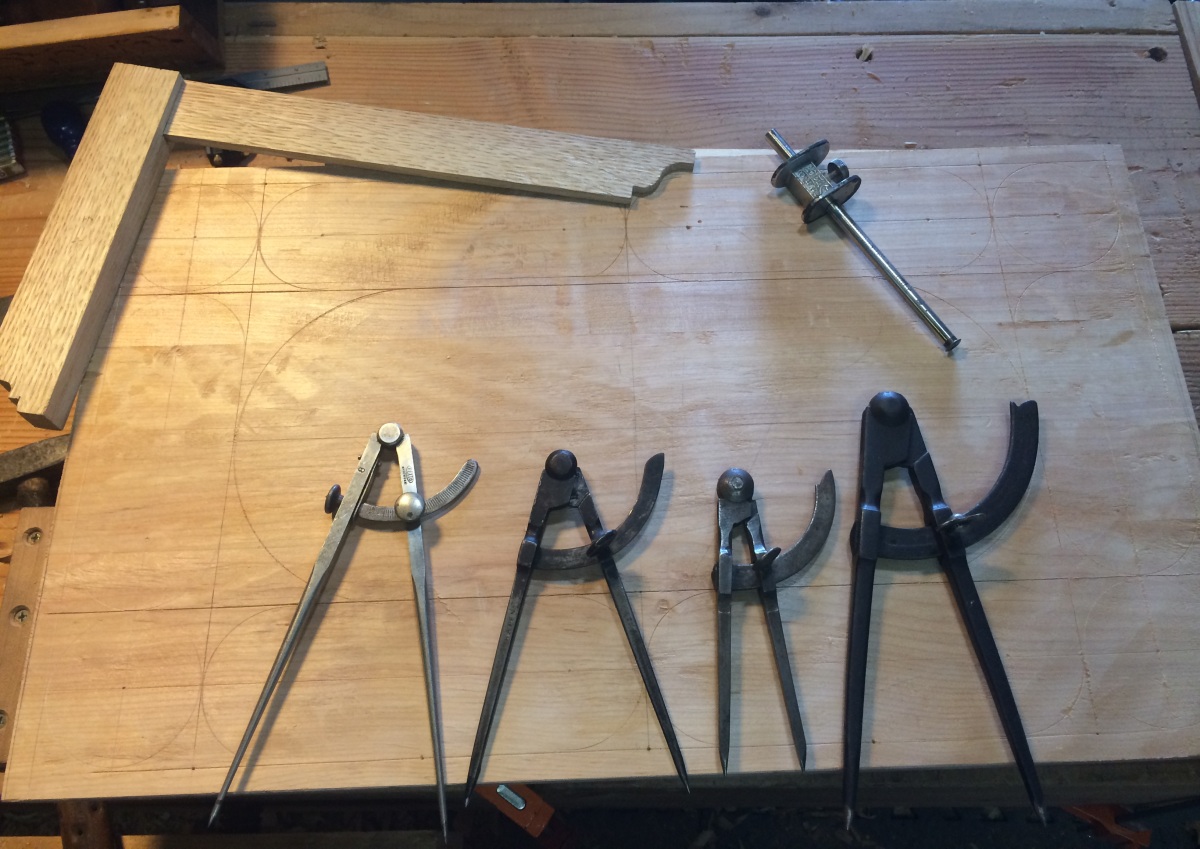
Staring the Layout
For this layout I started with a border around the edge, and set circles in the corners. I played around with proportions until I got something where I could put two S scrolls along the bottom, and a single one up the sides. Â Putting the roundel or circle in the corner made it easier to layout, and gives me lots of options for designs. Â I tried to do some strapwork based on the circles on a previous design and nearly drove myself mad trying to make it work with the proportions so I skipped that this time.
Since I knew I was going to put my shop name in the middle, I sub-divided my remaining space and used the center line to create two half circles at the ends to bound the middle space. I’ve seen a bunch of corner/triangular space filling designs in other chests and I thought this might be a good place to experiment with those.
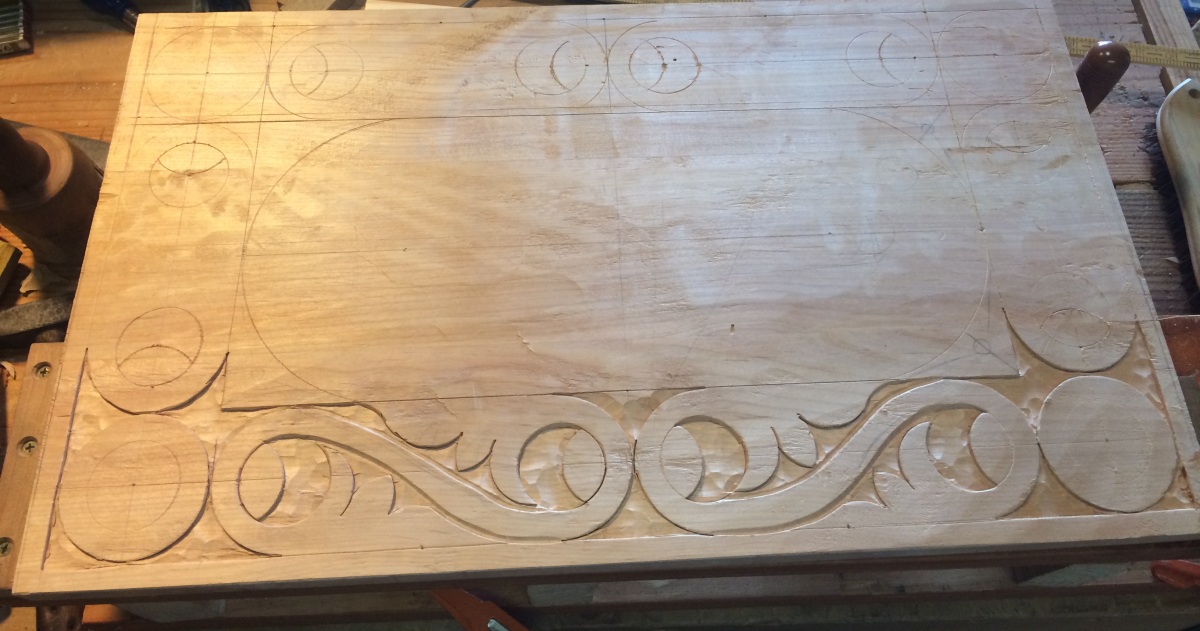
Carving the Scroll work
With the layout basically done, I started setting the scroll work, and relieving the background. Â I knew I had the carving demo coming up so I deliberately didn’t finish the outside edge so I could use it for examples in my demo. Â I experimented with a half button inside the loops, but I’m still not sure the design element works here.
Outline of the text and filling some space
For the text I went to my trusty word processor, picked a good font and started playing with layout. Â Once I felt I had something good, I started printing out samples and laying them on the wood. Â It took four tries to find the right spacing and layout. Â Once I had that I taped it down with blue tape, and went over the outlines with a pen directly on the paper pressing down HARD to make a dent in the wood below. Â This left a nice impression that I was able to follow later to make the letters.
I knew that “Woodworks would be much longer than “Badger” so I had to fill in some space as well. Â I tried free handing the design but I’m not sure it works as well as I was hoping, something I will need to practice some more.
To outline the letters I set in outline with 3 different chisels, a small medium curve gouge, a slight larger gentle curved gouge, and a straight/flat chisel. Â I was able to do almost every single curve with these two gouges. Â I had to be very careful on the thinner legs of the letters and already chipped one out which I had to glue the wood back in. Â Then it’s just a matter of relieving the outside, and texture punching the background.
More to come later as I finish the project.
Wood carving Demo at Rockler
Well, I think I just passed some kind of milestone. Â I did my first woodworking demo tonight. Â The Northwest Woodworkers Association asked me to do a demo of my carving at their monthly meeting held at Rockler. Â I think it went all right, they seemed to like it and I got some good compliments from the guys afterwards. Â It was my very first demo, and I’m not what you’d call good at public speaking. Â I was super nervous, but it went all right.
I’m teaching a class on Flat Relief Carving in April at this store, if any one is interested and I think there are at least a couple spots still open. Â It’s a two day class, $100 for the whole thing and they are going to have tools available I think. This was a good warm up for the class that’s for sure.
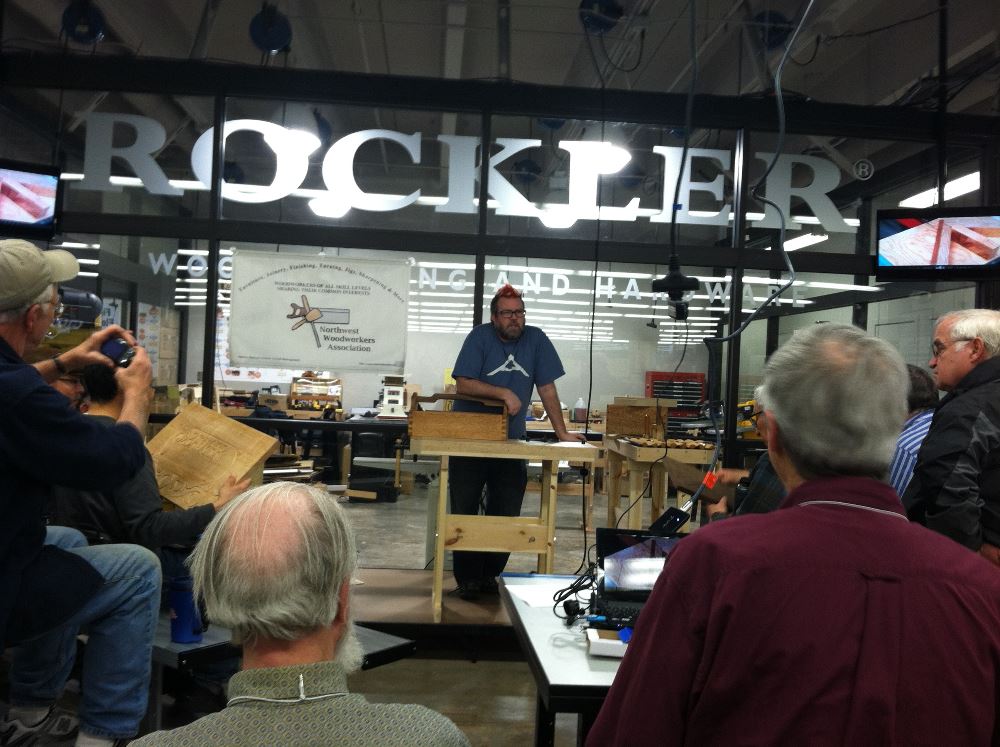
Doing the Demo at Rockler
http://www.rockler.com/retail/stores/wa/seattle-store/classes-store02
badger
Tool chest progress, Lids and Trays
Tool chest project: Part 1 – Part 2
I’ve been making slow but steady progress on my tool chest. Â I glued up my panel and frame lid, and it turned out quite nicely.

“If it’s worth doing, it’s worth doing well.” Panel and Frame lid all glued up.
The next step for the lid is to dovetail and attach the lid skirt aka the “dust seal” and put the hinges on. Â I’ve been taking a little bit of break from the lid, to work on the tool trays a bit. Â I had to stop work on the lid because I realized I didn’t have clamps long enough to put the right kind of pressure on dust seal. Â Besides, I like carving…
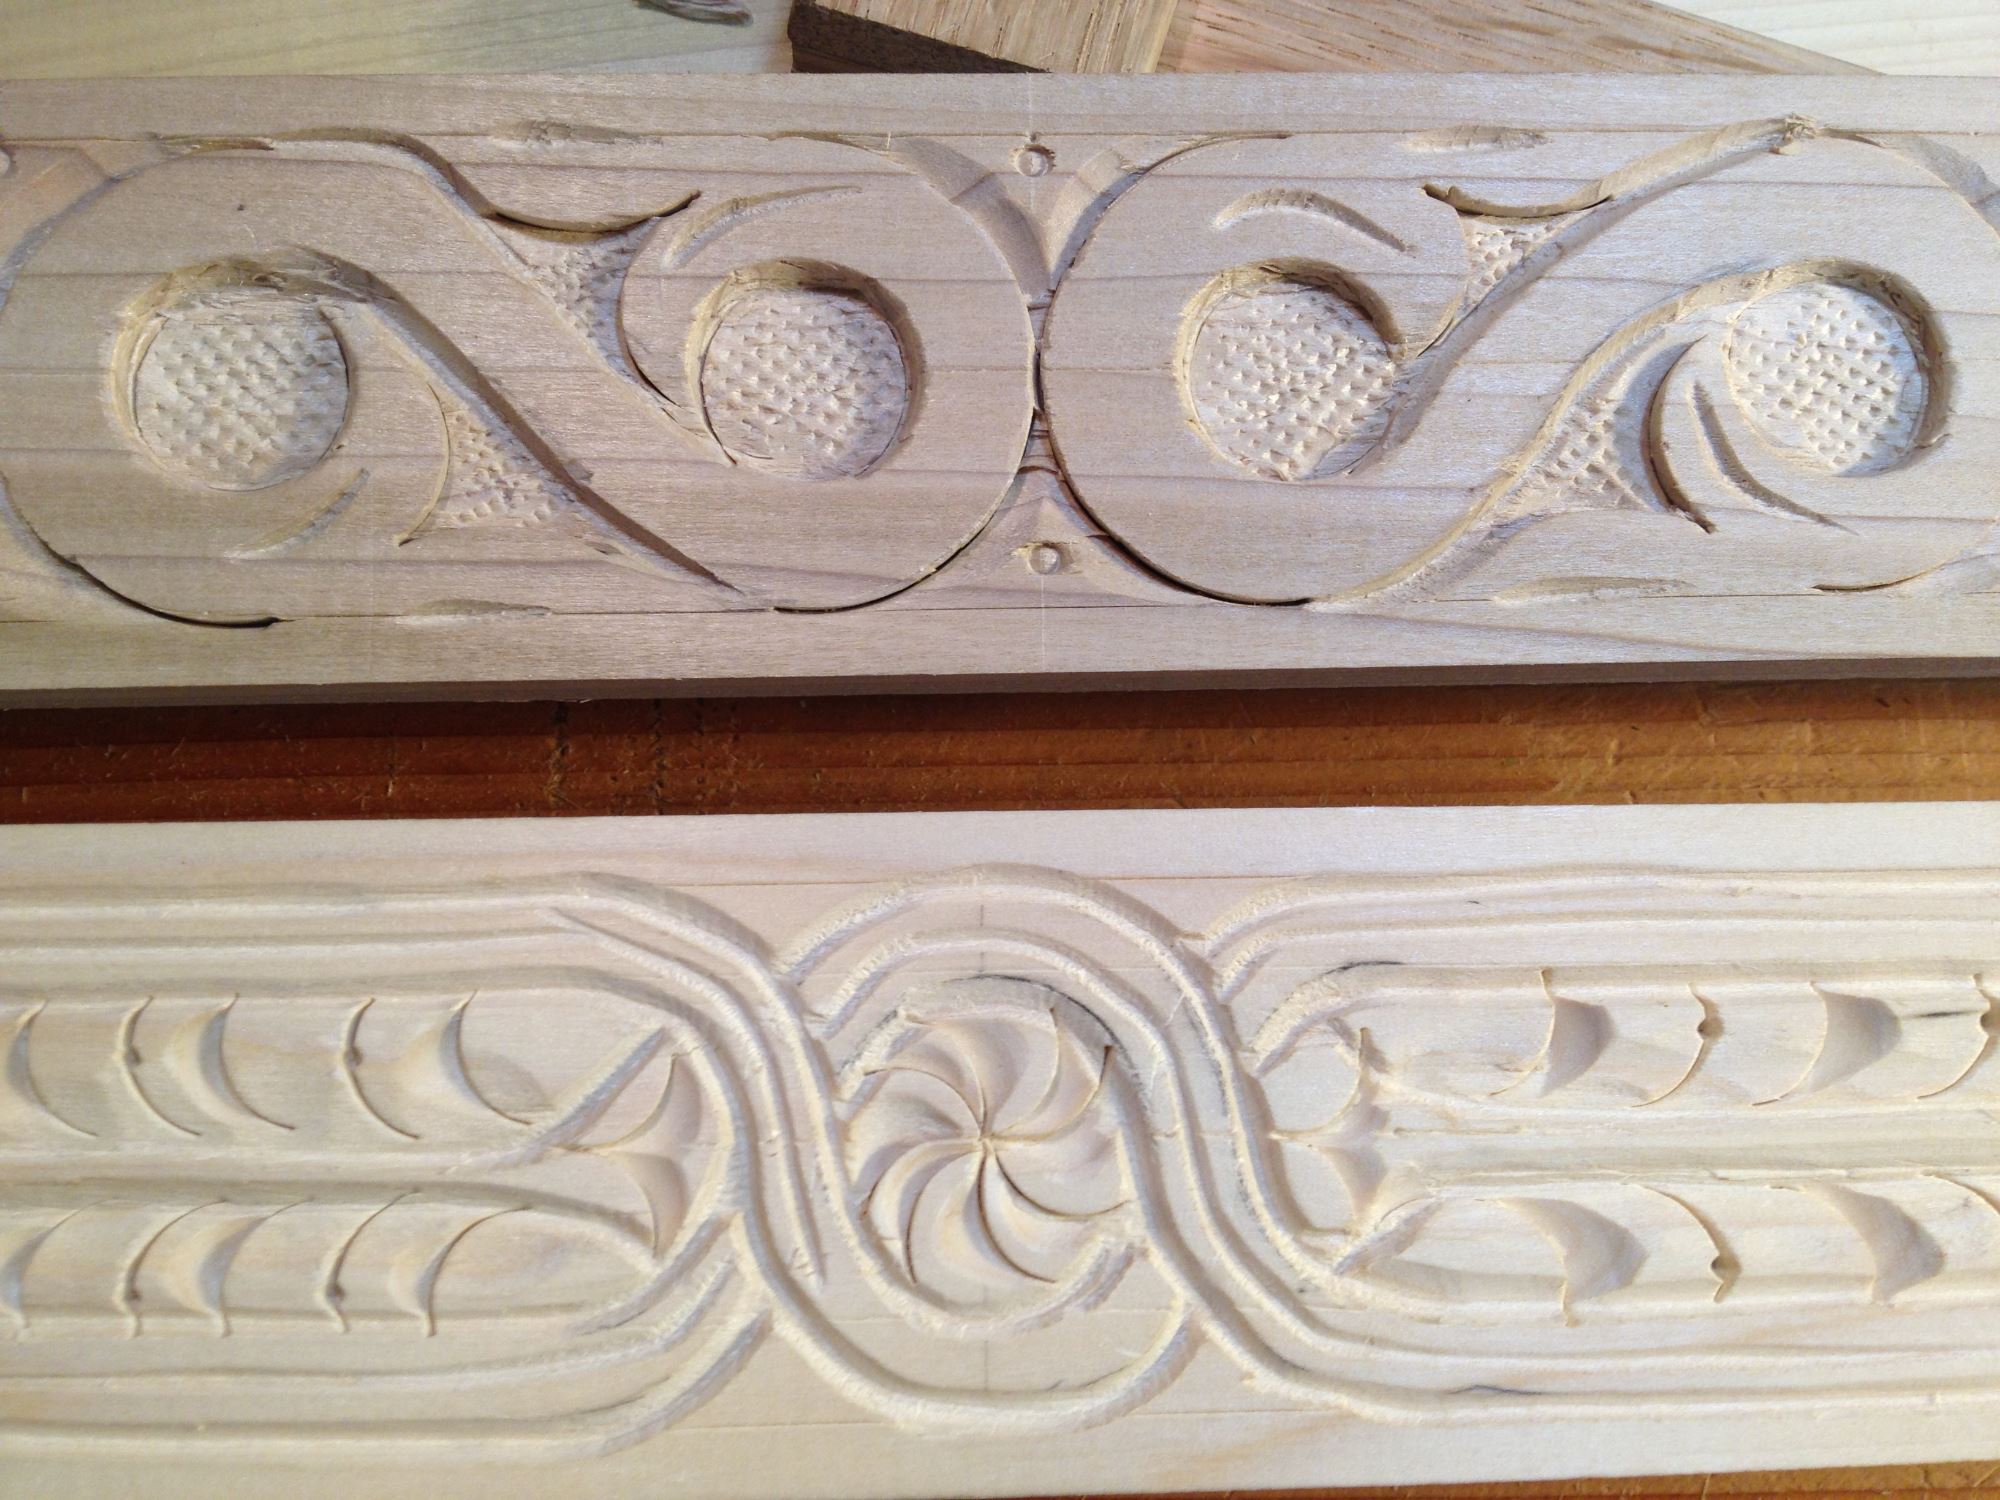
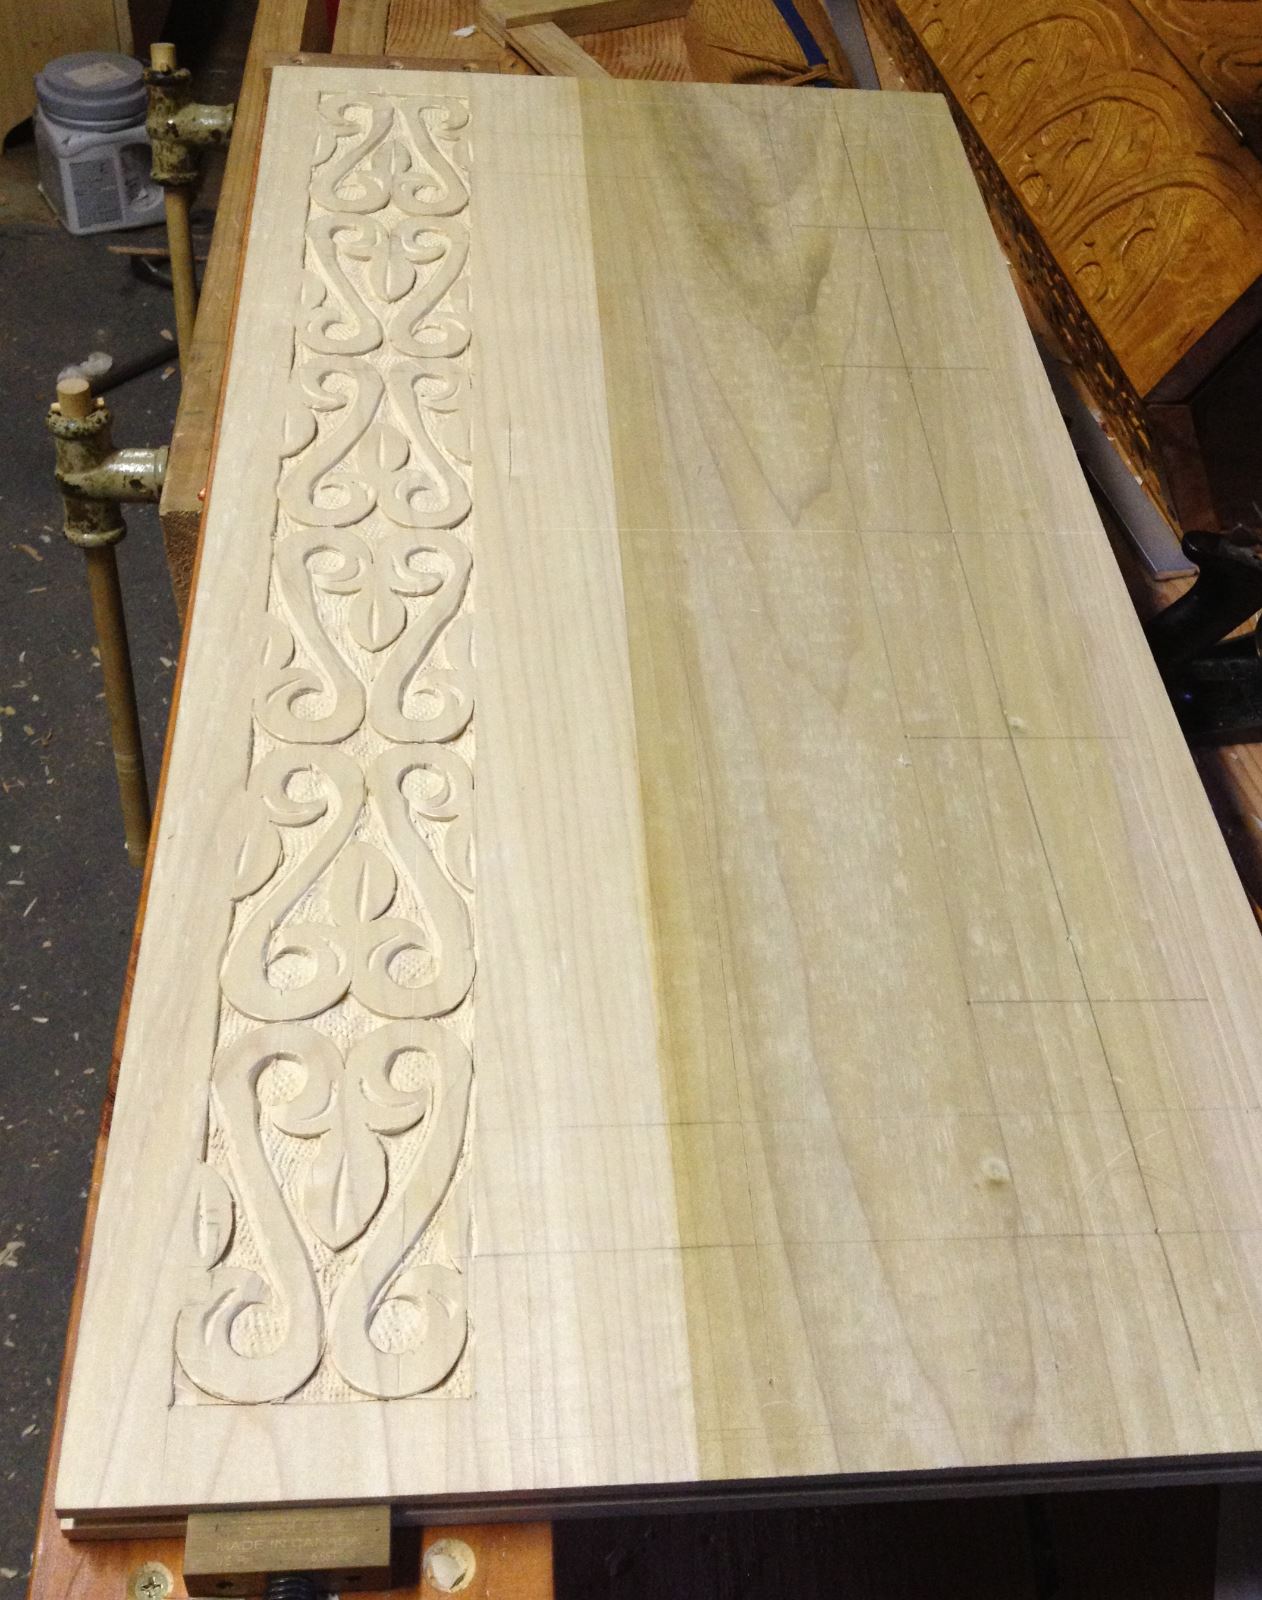
Detail shot of the carving for the sliding tool trays.
The top two trays will be shorter, with the bottom tray much deeper. I am trying out some of long thin patterns that normally go on the thin stiles of chests in 17th century style carving. Â The S Scroll should come as no surprise, it’s common as dirt on most carved items from the period. Â This is primarily due to (in my humble and increasingly practiced opinion) it’s incredibly flexible nature. Â You can fit it in long thin areas, wider long areas, or as more elaborate center panel design. It stretches, and scales nicely into lots of spaces, unlike strapwork or guilloche type carving which requires a more careful layout approach. Â It’s also a relatively simple pattern to carve, especially when your tool kit is more limited. I’ve even seen chests that use primarily if not exclusively the V tool to carve all the scrolls.
The second pattern is a new one for me, that I quite like how it worked out. Â It’s based on the vertical stile (I hope that’s the right term, I get my muntins and stiles mixed up) on a Thomas Dennis or William Searle chest at the Met. Â It looks floral which was common, but I keep thinking of it as a feather.

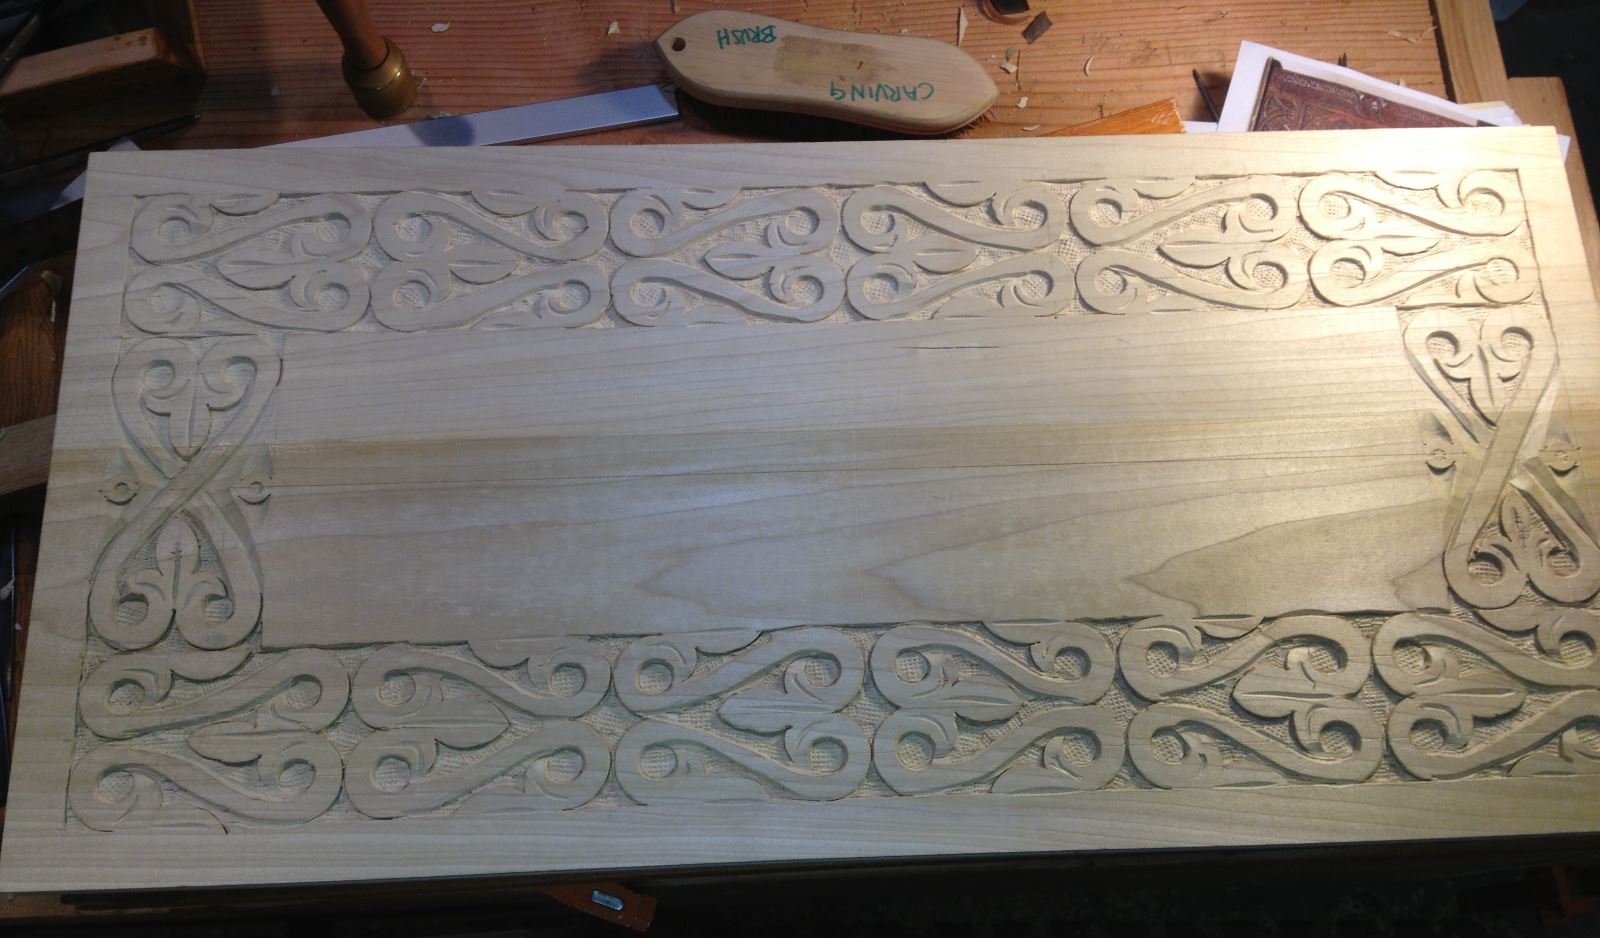
Full view of the two tray sides.
Hoping to get some quality time in the shop this weekend, but I might end up playing with Legos with my son. Â Tough job sometimes, but it’s got to be done.
Badger
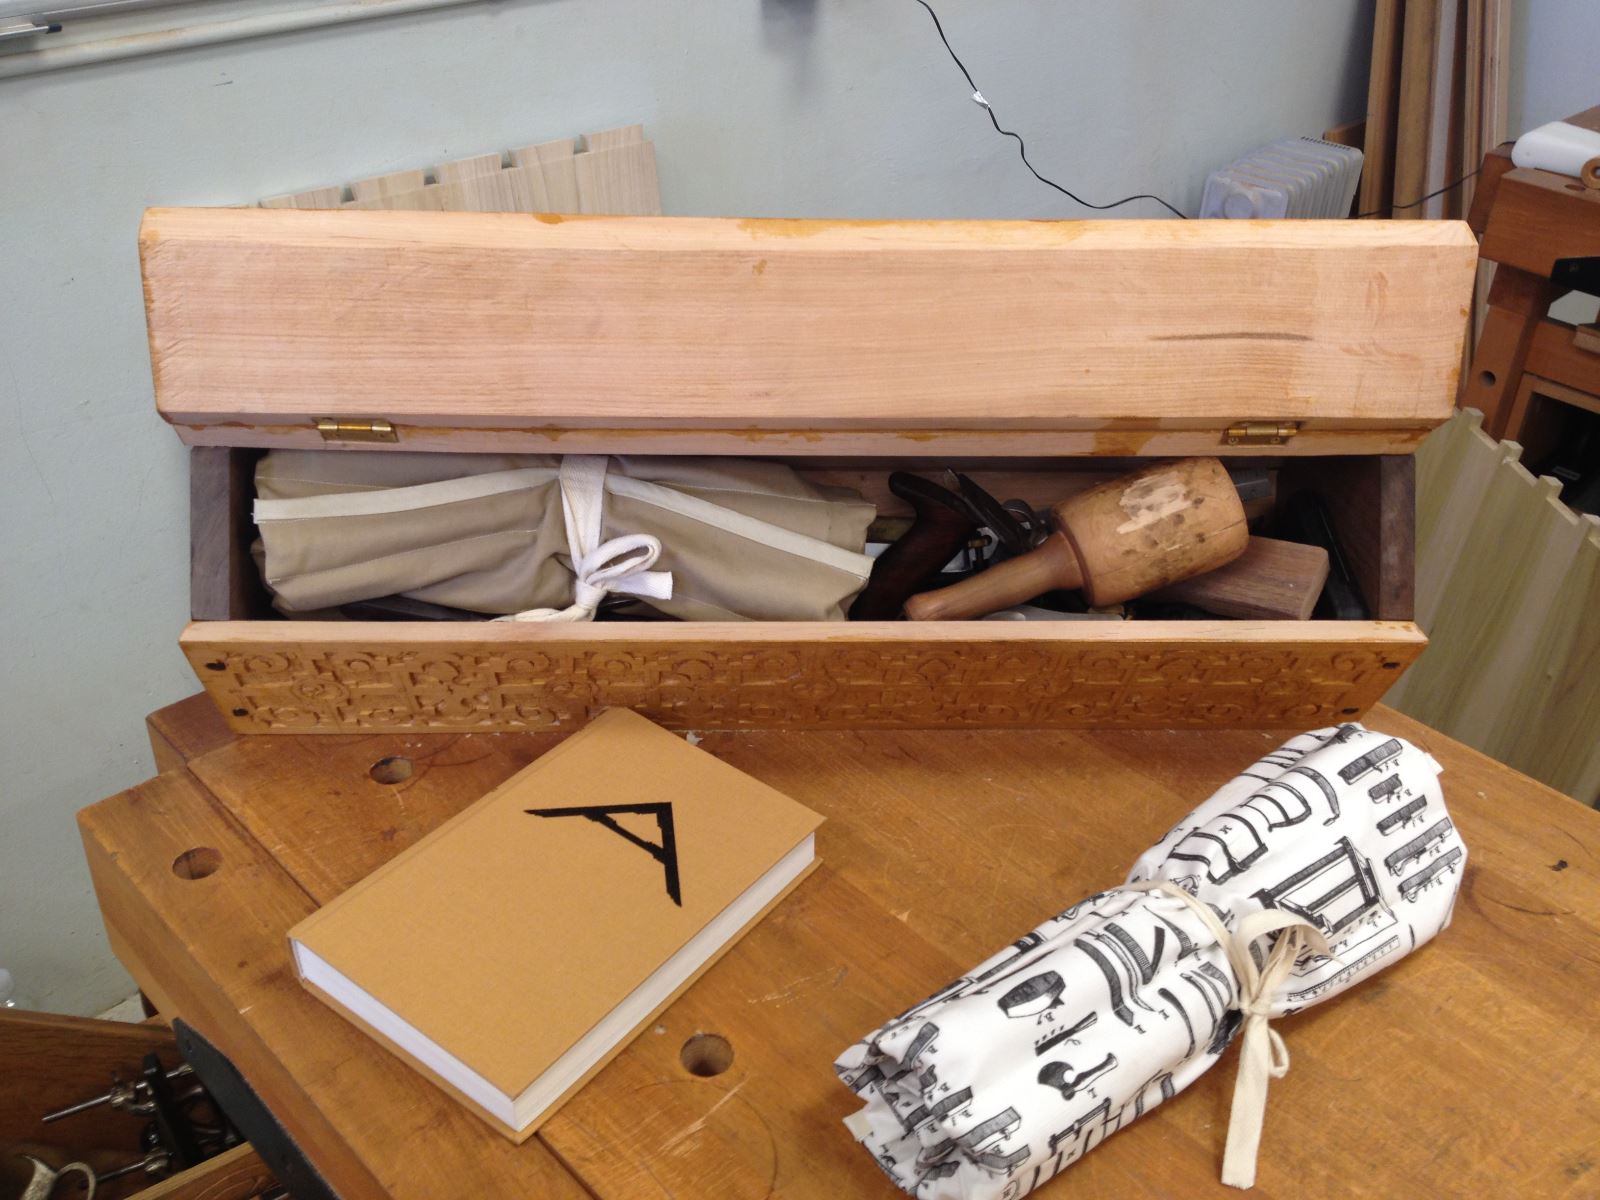
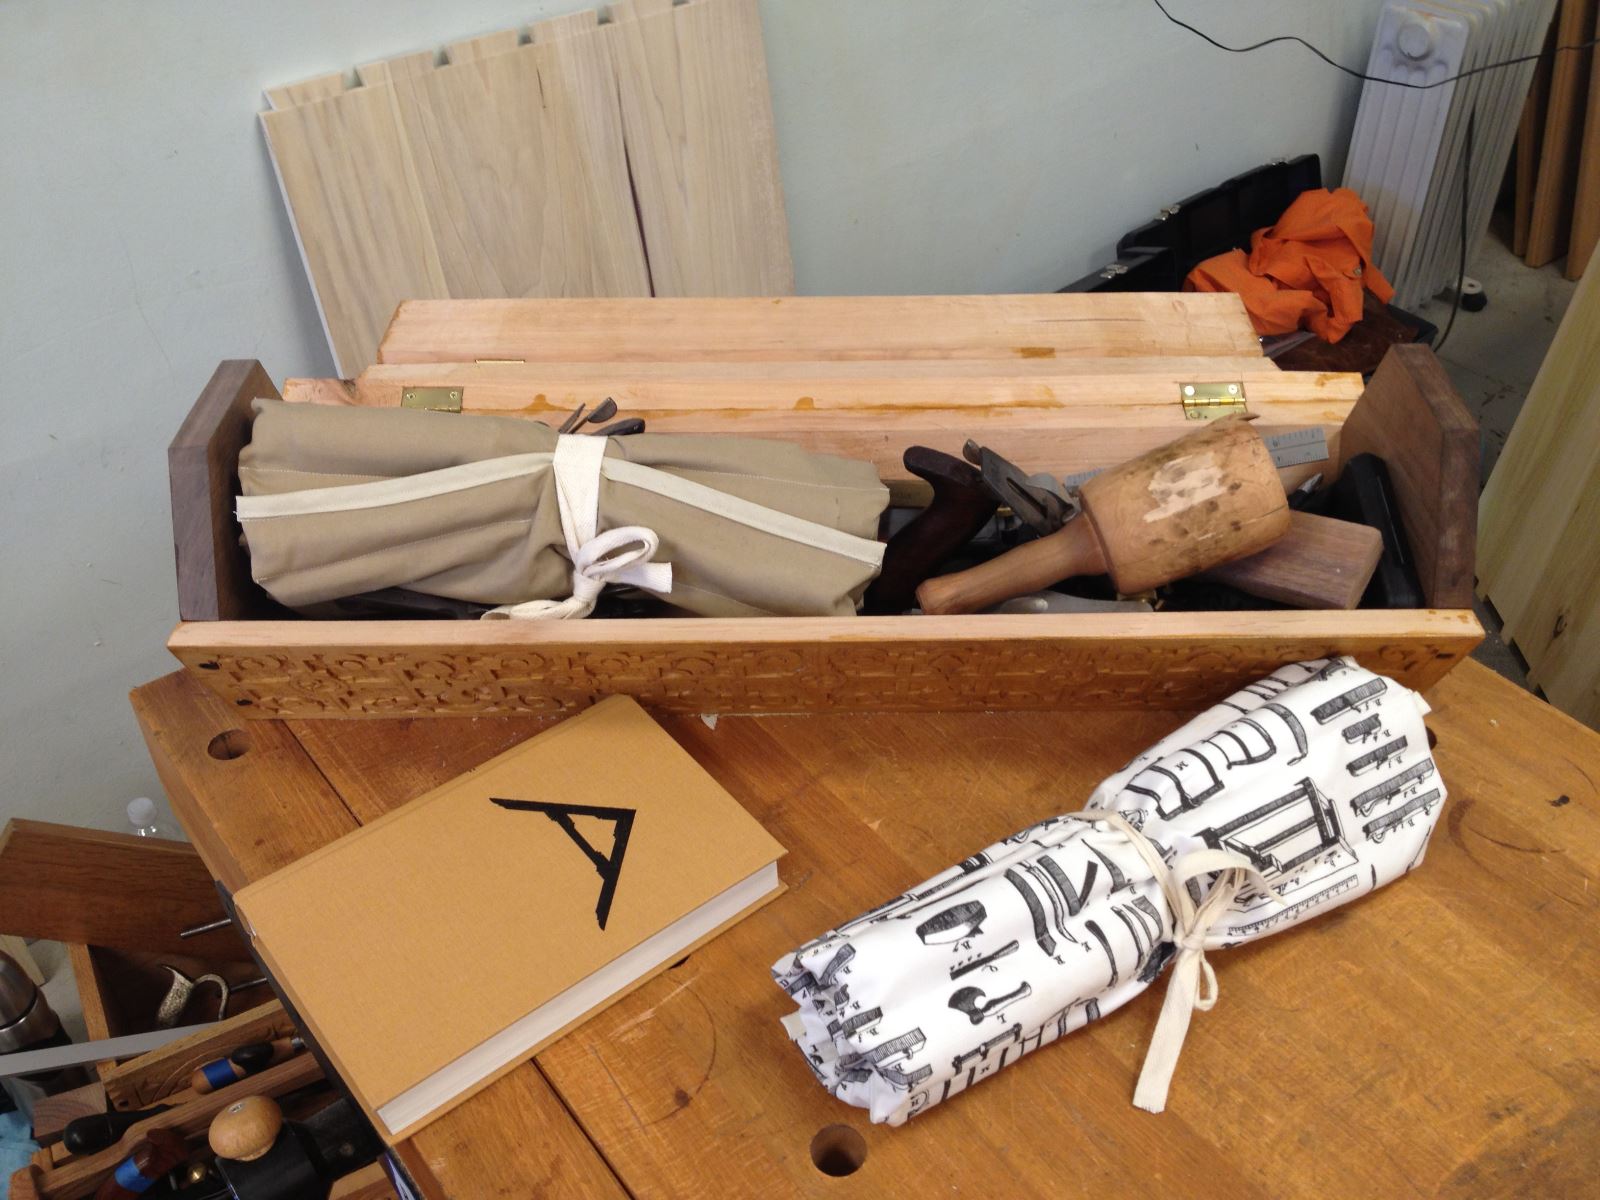
My carving tool kit.
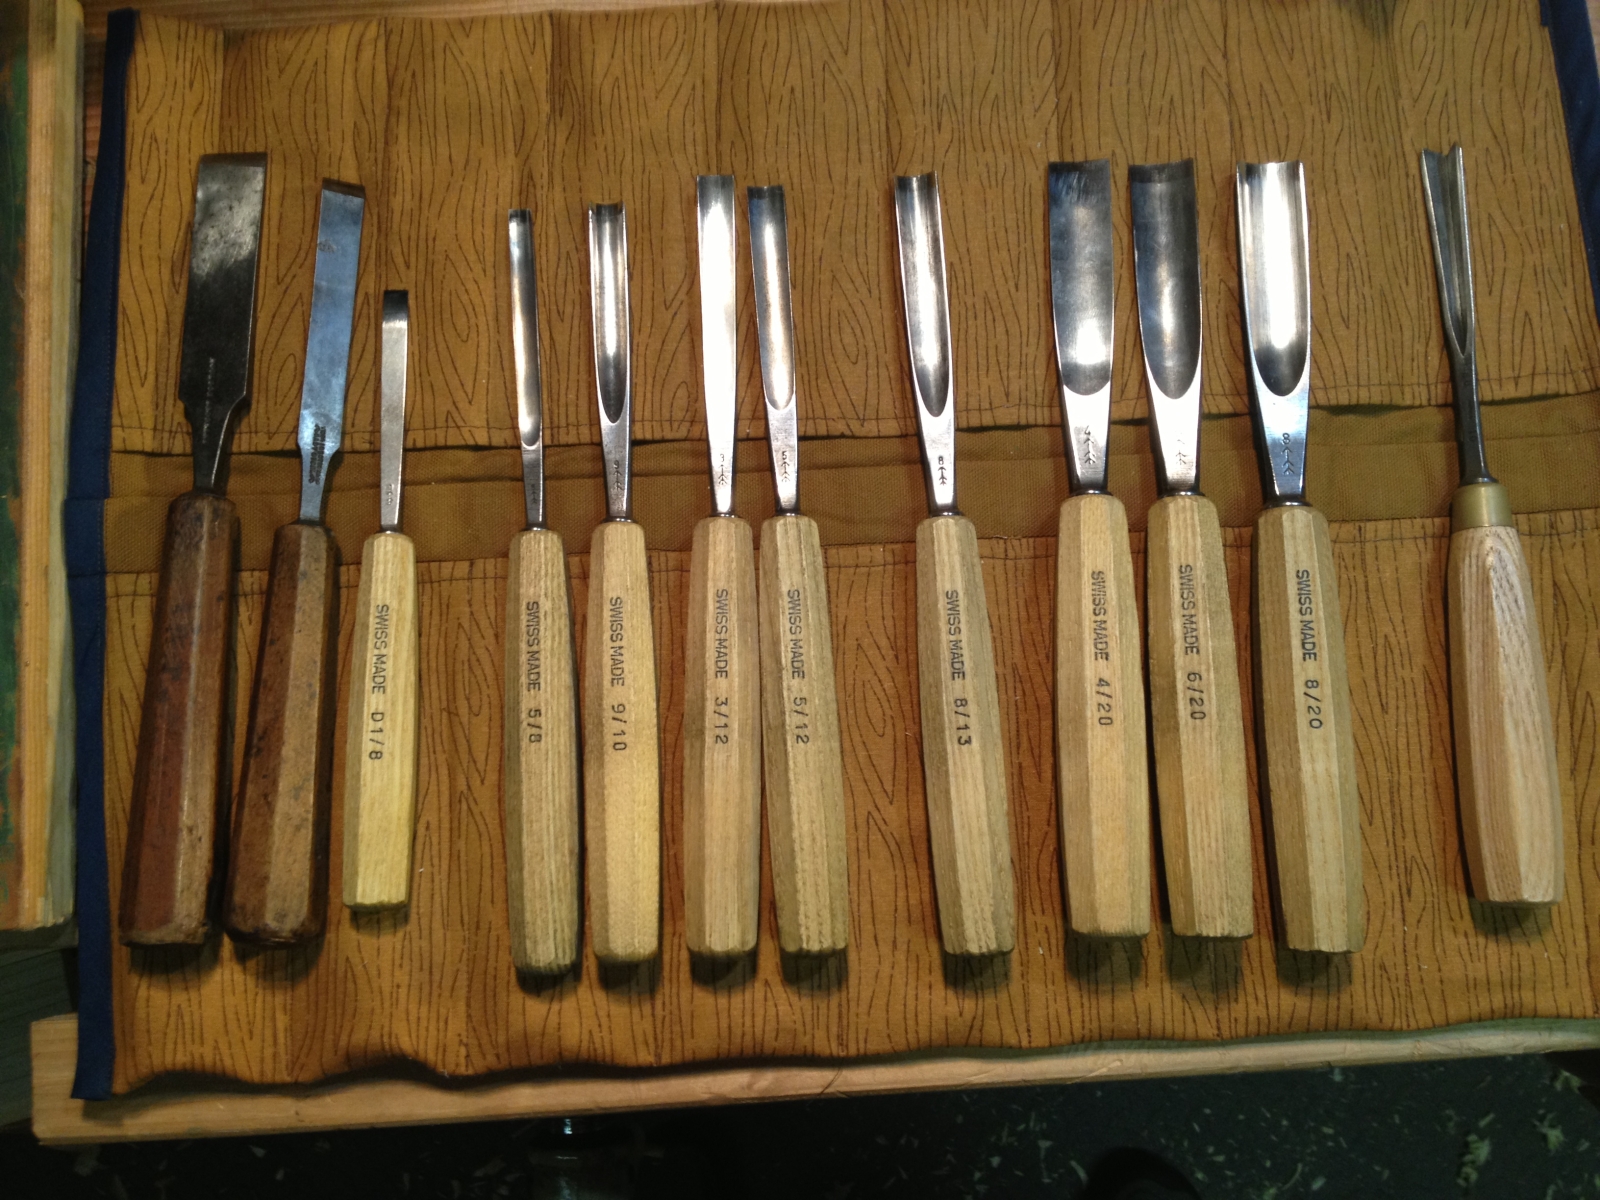
My current carving tools
As I was working on the carving for my tool chest lid, I was struck by how few chisels I actually use and how much I get from them. Â I’ve seen photos of carvers who have vast amounts of chisels in their arsenal, and I am always a little jealous of those people. Â However, at $35 – $50 a pop for mid range chisels, it’s hard to justify that kind of expenditure for my hobby.
I originally started with six chisels, and have added a few here and there. Â My initial purchase decisions were based on Peter Follansbee’s recommendations, and this gave me a very solid and flexible starting set. Â To this initial set, Â I’ve added a couple of straight chisels that I got in a lot of tools I picked up somewhere. Â They were straight sided and with decent steel so I reground them to be flat carving chisels. Â I usually only use them for outlining the outside of a pattern, so these aren’t must haves. In fact, I could probably get the same out of my bench chisels.
I also added a small flattish gouge for relieving the background, the 5/8 does a great job of getting into tighter spaces than the 12’s do for some of the patterns. Â I also added couple of different curved gouges to fill in some of the gaps, but they are not used as much as my core set.
I’ve also upgraded my V tool from the Pfeil to a Auriou version from the Chris Pye set that Lie Nielsen is selling now.  The V tool is very important, and the Auriou is very comfortable to hold and use.  If you want to get into it you can read a lot of good stuff from Chris Pye and Mary May on the V tool, it’s worth spending the time to understand this tool.  It’s also worth the time to practice A LOT with this tool to build the muscle memory and comfort level, something I’m still working on.
In the style of carving I do, you can get a lot of mileage out of a few curved gouges and it’s really hard to go wrong with Peter’s original suggestion and build from there. Â My next purchases will probably something in the 7/12 range to give me a smaller gouge for outlining.
Badger
Tool chest progress, finishing the lid.
Previous post on tool chest here.
Made some progress on my tool chest this weekend. Â I’ve been plugging away at it slowly since I brought it home from my class in Port Townsend.
Detail shot of the carved lid.
First challenge was fitting the beast into my small shop, which is really just the back end of a two car garage that is full of boxes of stuff. Â I was worried that it wouldn’t fit, and I’d have to dance around it to get anything done until I totally re-arranged everything.
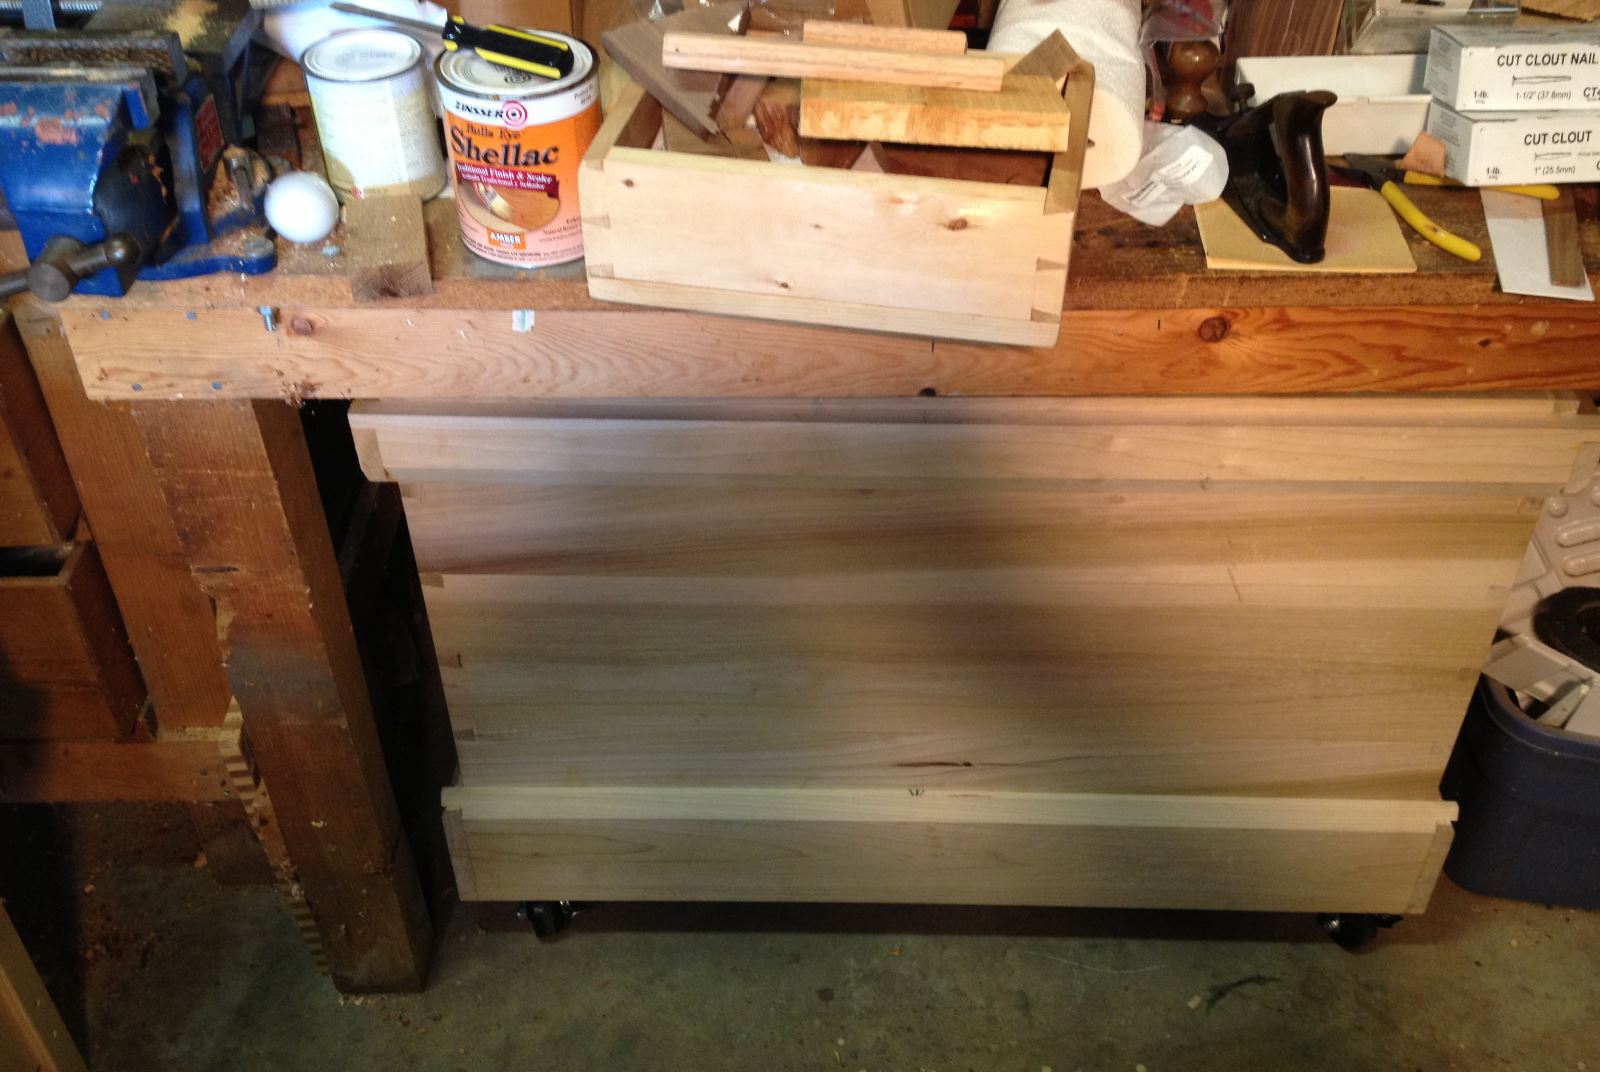
Luckily it just barely fits under the grungy shop workbenches that came with the house. Â With room for the lid.
With that sorted, I was able to turn my attention to the lid, which was still un-assembled because I wanted to trick it out with some carving. Â My understanding is that traditional chests were plain on the outside (because they get beat up a lot) and the underside of the lid and inside were usually prettied up with marquetry, and fancy veneer and the like. Â Since I can’t do any of that I thought I’d do some carving, like I like to do.
It started as conversation at the tool chest class, about how Peter Follansbee used some of his sample carvings for the runners inside his chest. Â One thing led to another and I decided to carve the underside of the lid, the tray sides, and possible the runners as well. Â You know, just to show off. 🙂
Here are some progress shots of the lid.
One row of S-Scrolls for the underside of the lid.
Second row of S-Scrolls complete.

Final arrangement of carving for the inside of the panel done.
I had some thoughts around the design of the outside edge of the frame, but it had taken quite a while to get to this points, so I was thinking of a few different options including calling to good enough.  I’ve been re-reading the Joiner and Cabinet Maker and a quote from Thomas jumped out at me.  So I carved it into the upper and lower rail to remind me to slow down and do it right.
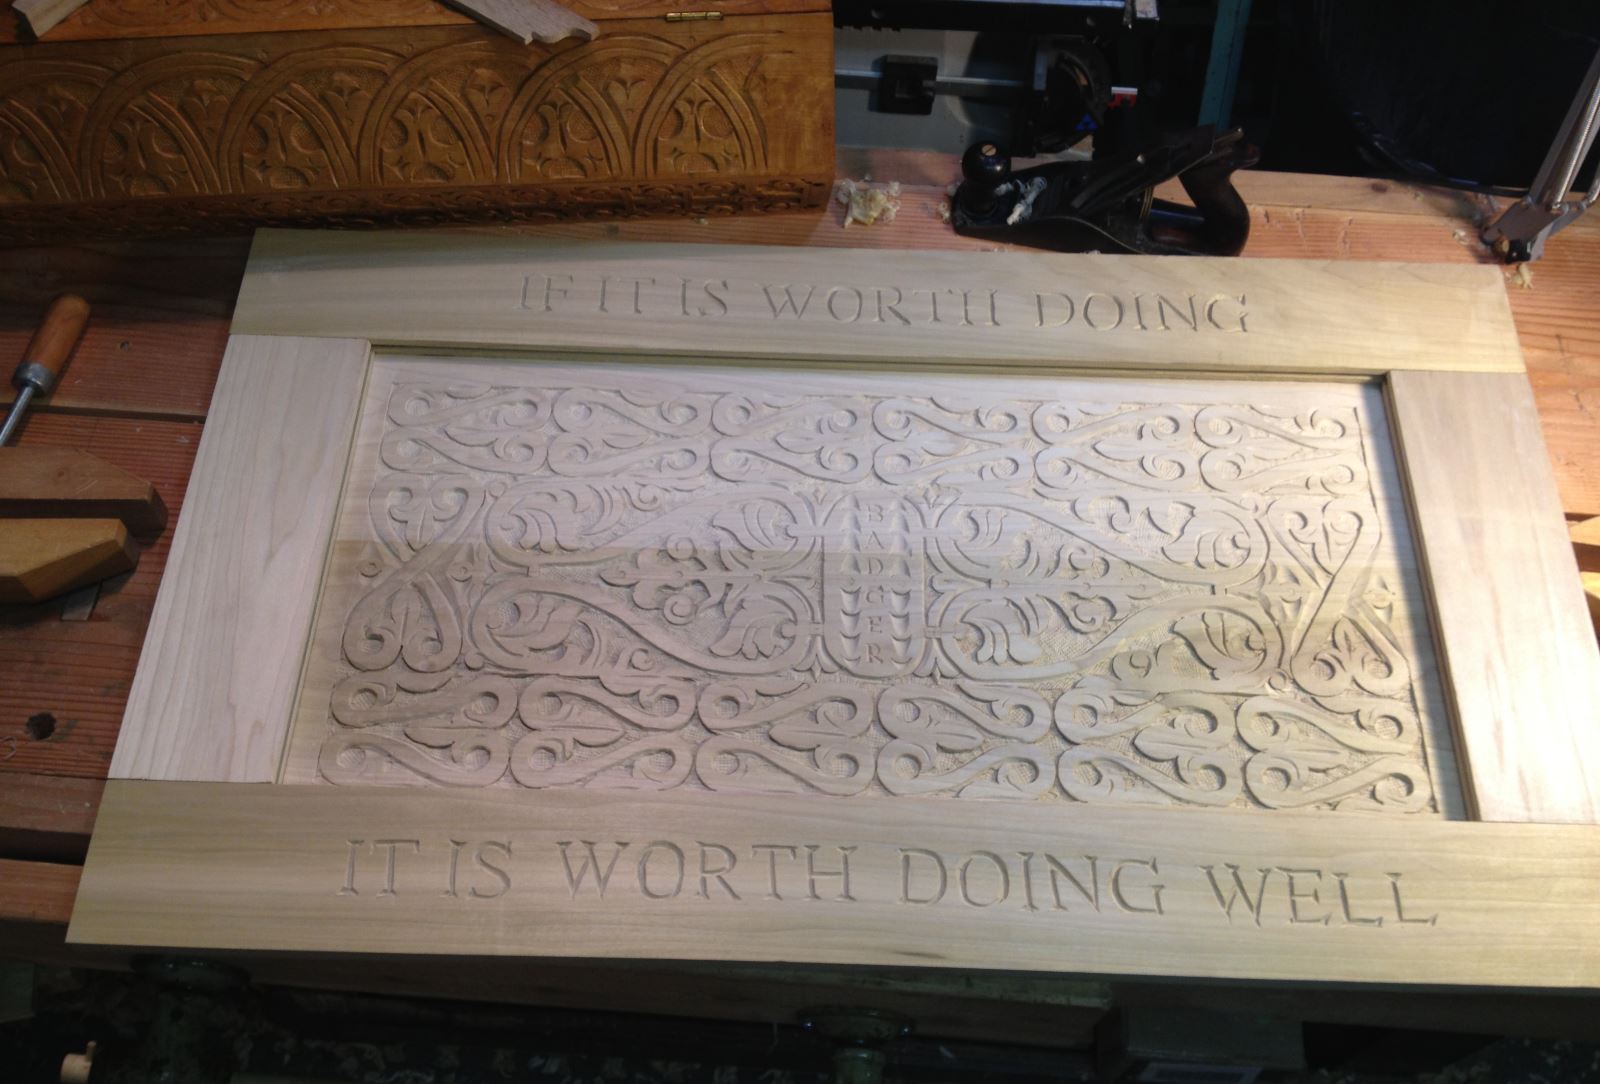
Frame and panel for the lid. The frame is just laid on top of the panel, just to show how it would look.
To get the lettering right, I printed out the words in 2″ on my inkjet and cut them out in rows. Â Taping this to the frame rail with blue painters tape I went over each letter with a pen to impress the outline into the wood underneath. Â Followed by a pencil to outline the edges, which gave me a guide to follow with my V tool. Â I have never done lettering like this before, but I have been carving for a while now so I went with my instinct and put tool to wood. Â It worked out well, and I was actually pleased with how it came out. I found an article later that says I figured it out pretty well.
Next step, fitting the panel into the grooves of the lid (it’s being stubborn about it right now, so I need to trim some edges), and gluing everything together. Â Not sure if I’m going to finish the underside of the lid though, it really wants one but I’ve heard that is a bad idea. Â Maybe just some clear shellac?
Building a Tool Chest with Chris Schwarz
Last week I had the distinct pleasure of meeting Chris Schwarz and taking five days of his time to work with him and others to build a Tool Chest out of his “Anarchist’s Tool Chest” book.
In short: I had a blast, met some great people, and made most of a tool chest.
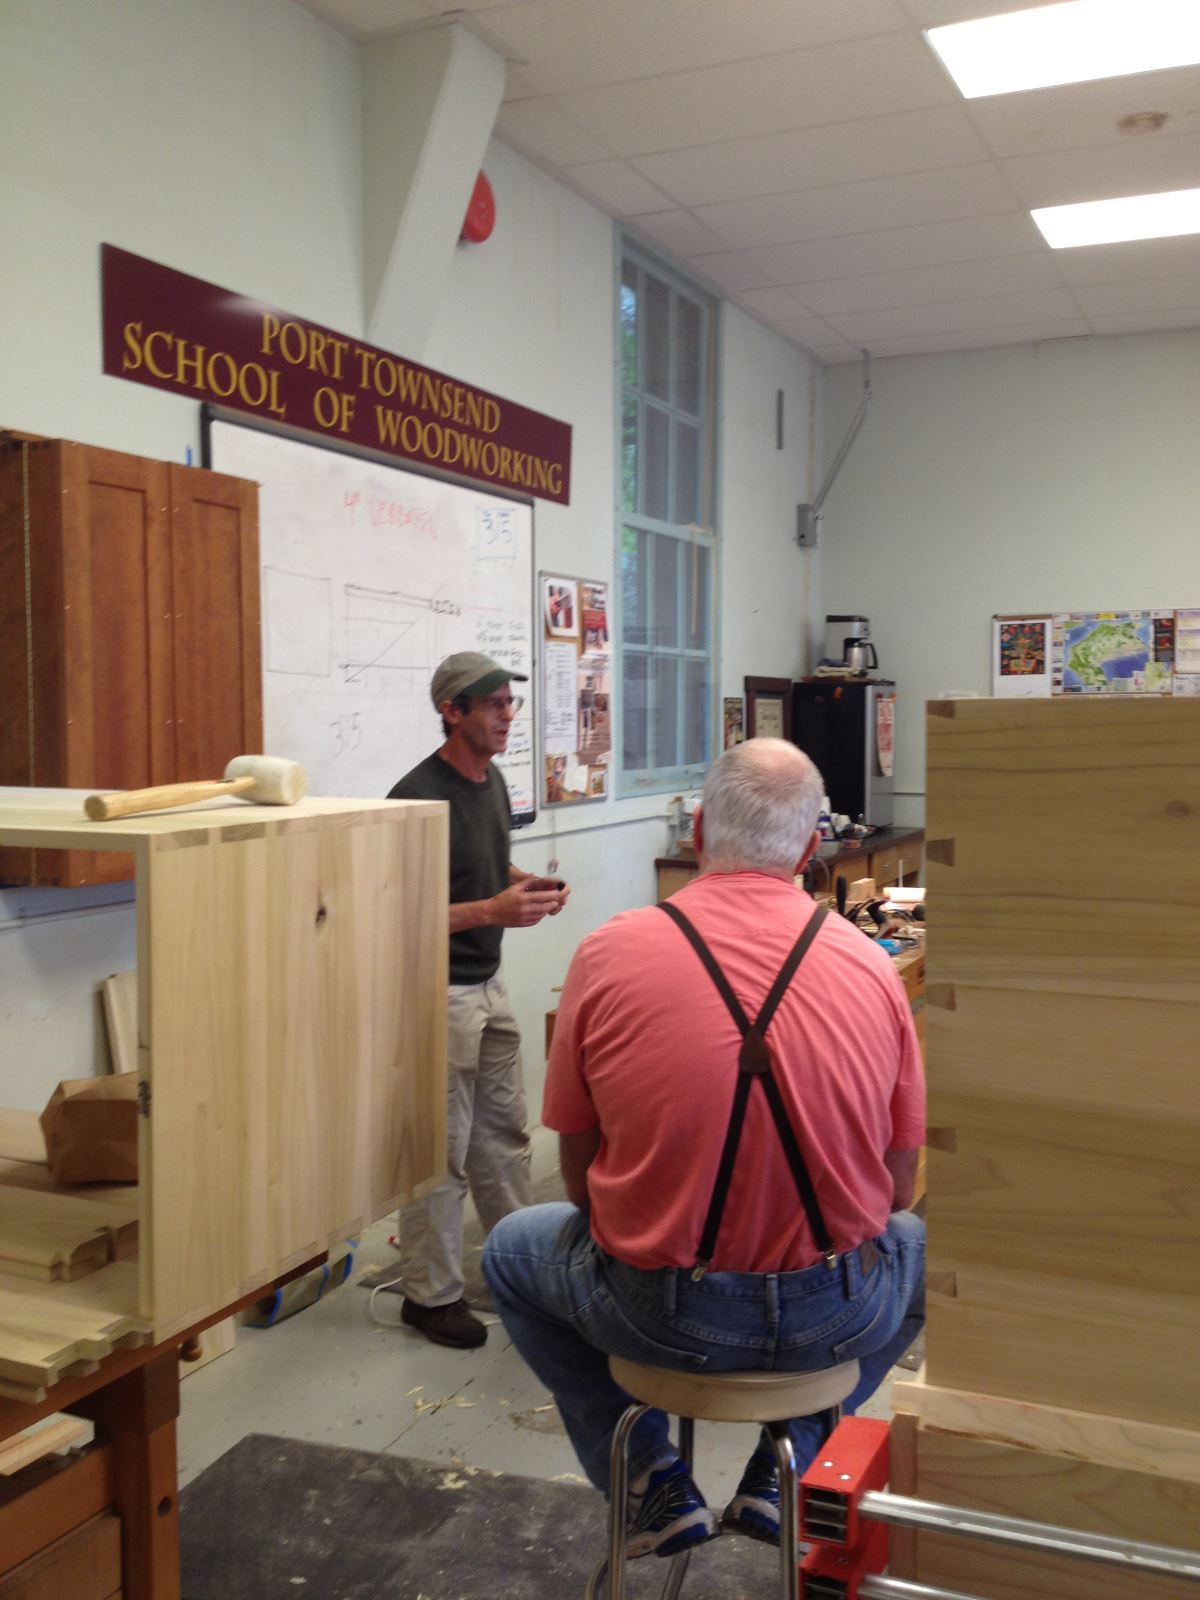
The class was held out in the awesome Port Townsend School of Woodworking where I’ve taken a few classes before. Â It’s always a wonderful trip out there, and the setting is amazing. Â Nestled in the back of the Fort Worden State Park, the shop where instruction is held is nice and open and well stocked with benches and tools if you don’t have your own.
This class had ten people who in the end were described as “off the hook wackos” and I agree. Â If by wackos you mean great guys, with quirky senses of humor who are willing to work hard and help each other, then yes. Â We’re wackos, and proud. 🙂
Chris was just the guy you read on online, smart, educated and willing to share what he’s learned. He’s also humble, and opinionated at the same time but willing to present his ideas in a way that allows for self exploration rather than dogmatic repetition of steps. Â He’s willing to teach, but willing to learn as well, which I find to be a admirable trait in a person. Â A lot of people on the internet love to hate him for having contrary opinions, but I think they’re misguided and close minded (On the internet? What? No way?!).
I had a lot of the skills I needed already to build this chest, but in this class I learned how to use those skills better and picked up some new tricks for things like dovetails, mortising, sawing and more. Â I made some great friends there, and got to know some I’ve met before (Rob, I’m looking at you) much better. Â All in all I had a great time, and was sad to leave the class.
Here are some pictures and posts that other people took:
Chris Schwarz @ Lost Art Press -Â http://blog.lostartpress.com/2013/09/08/photos-from-the-tool-chest-class-in-port-townsend/
Joiners Apprentice aka Rob -Â http://www.thejoinersapprentice.com/2013/09/anarchy-in-pt.html
Tim Lawson -Â http://timlawson.smugmug.com/PTSWPT/2013-Images/Build-a-Toolchest-Sep-2013/i-xTq8dmW
And here are some that I took:

Here is what I managed to accomplish in five days of work with lots of help from Chris, Rob and the class. It’s really solid, and I’m pretty proud of it.

A picture of part of my drive. I commuted to the school from Seattle every day, which took about 2 hours each way and a ferry ride. I was called crazy, and insane for doing this, but it really wasn’t that bad.Â
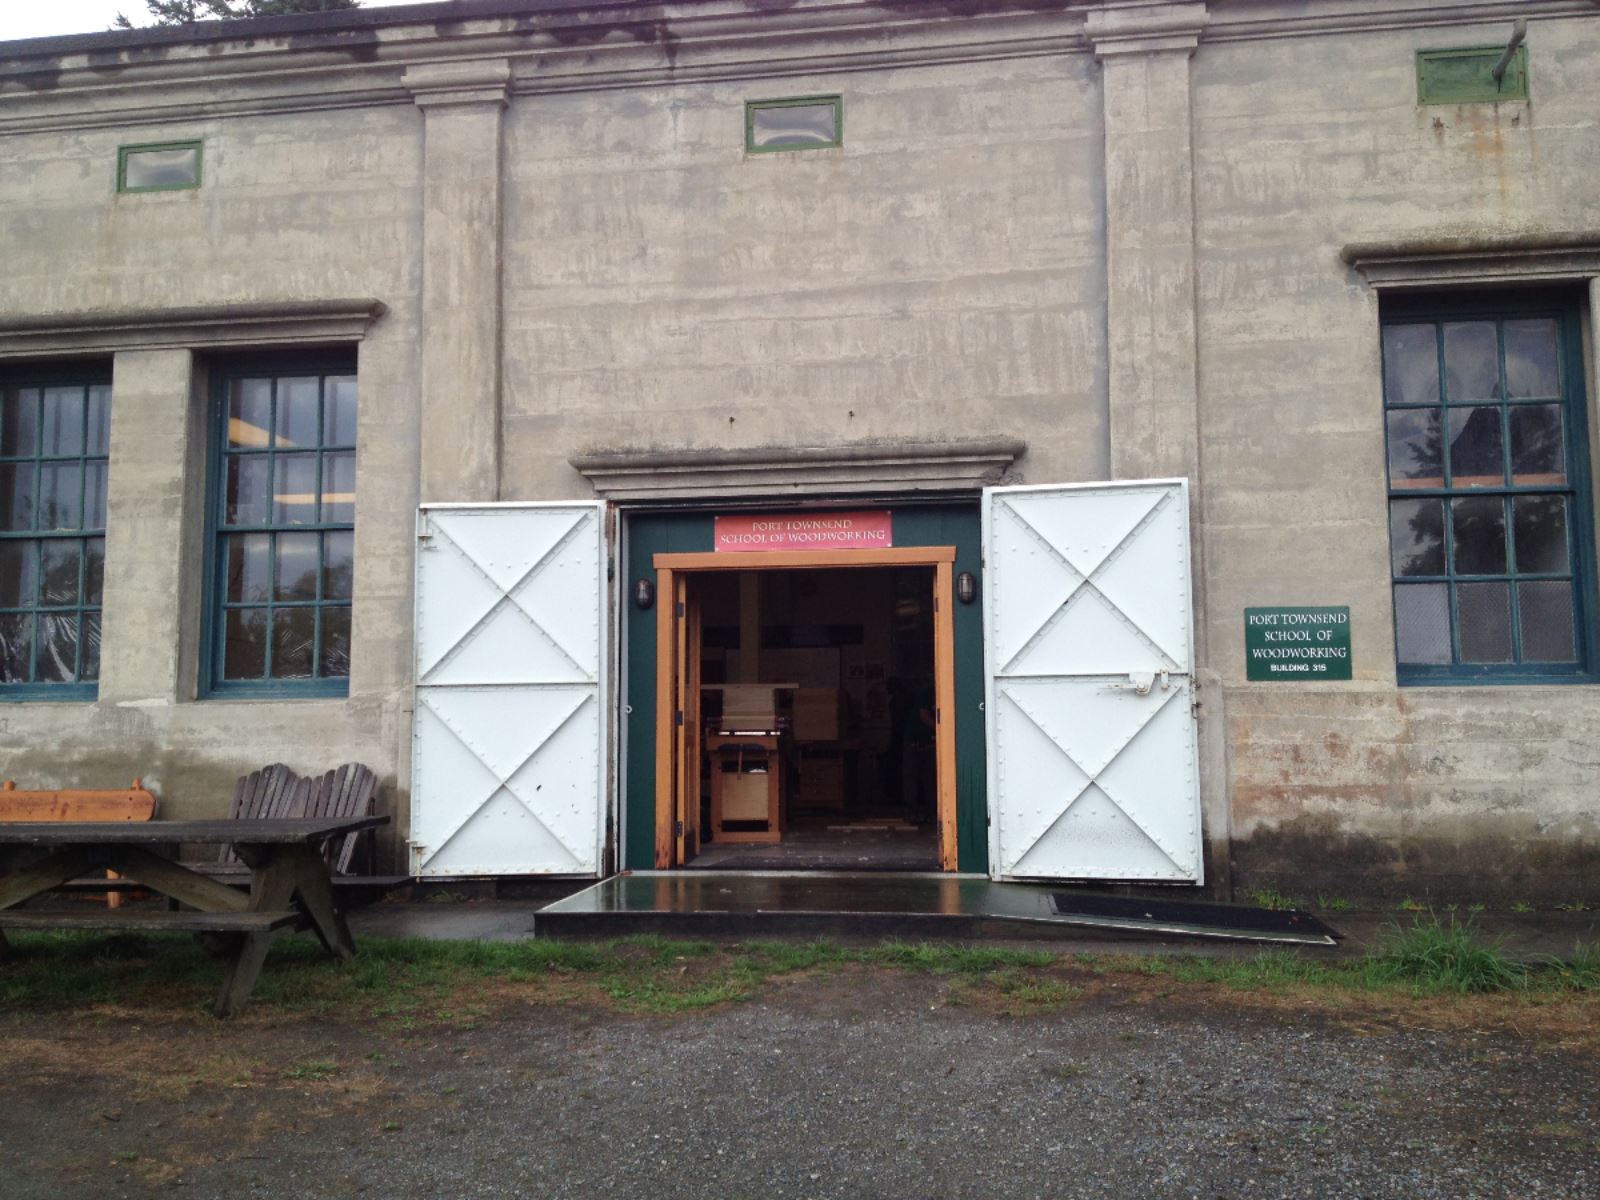
The front doors to the school. And yes those doors are literally bomb proof.

The class was a good mix of doing (lots of doing) and learning from Chris. It was very hands on and I learned a lot this way.
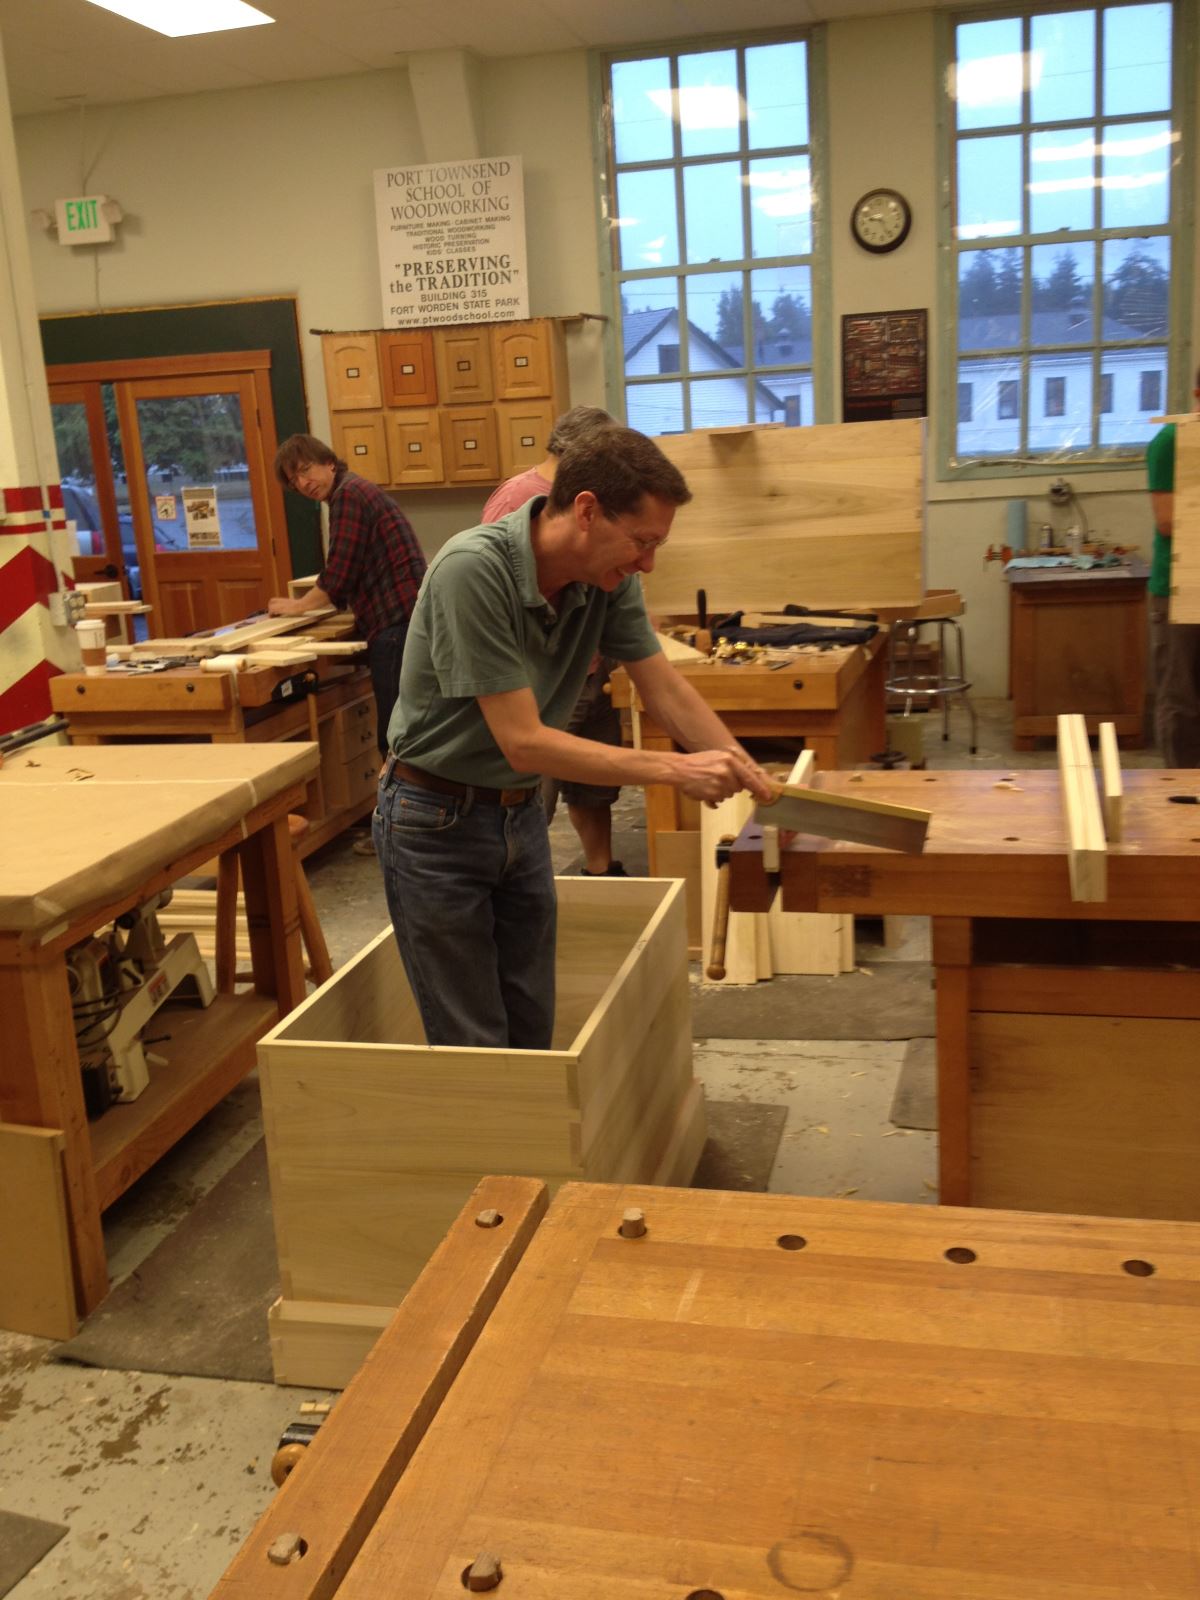
Bill really got into his work. (sorry, couldn’t resist).

My shell glued up and the skirting put on.
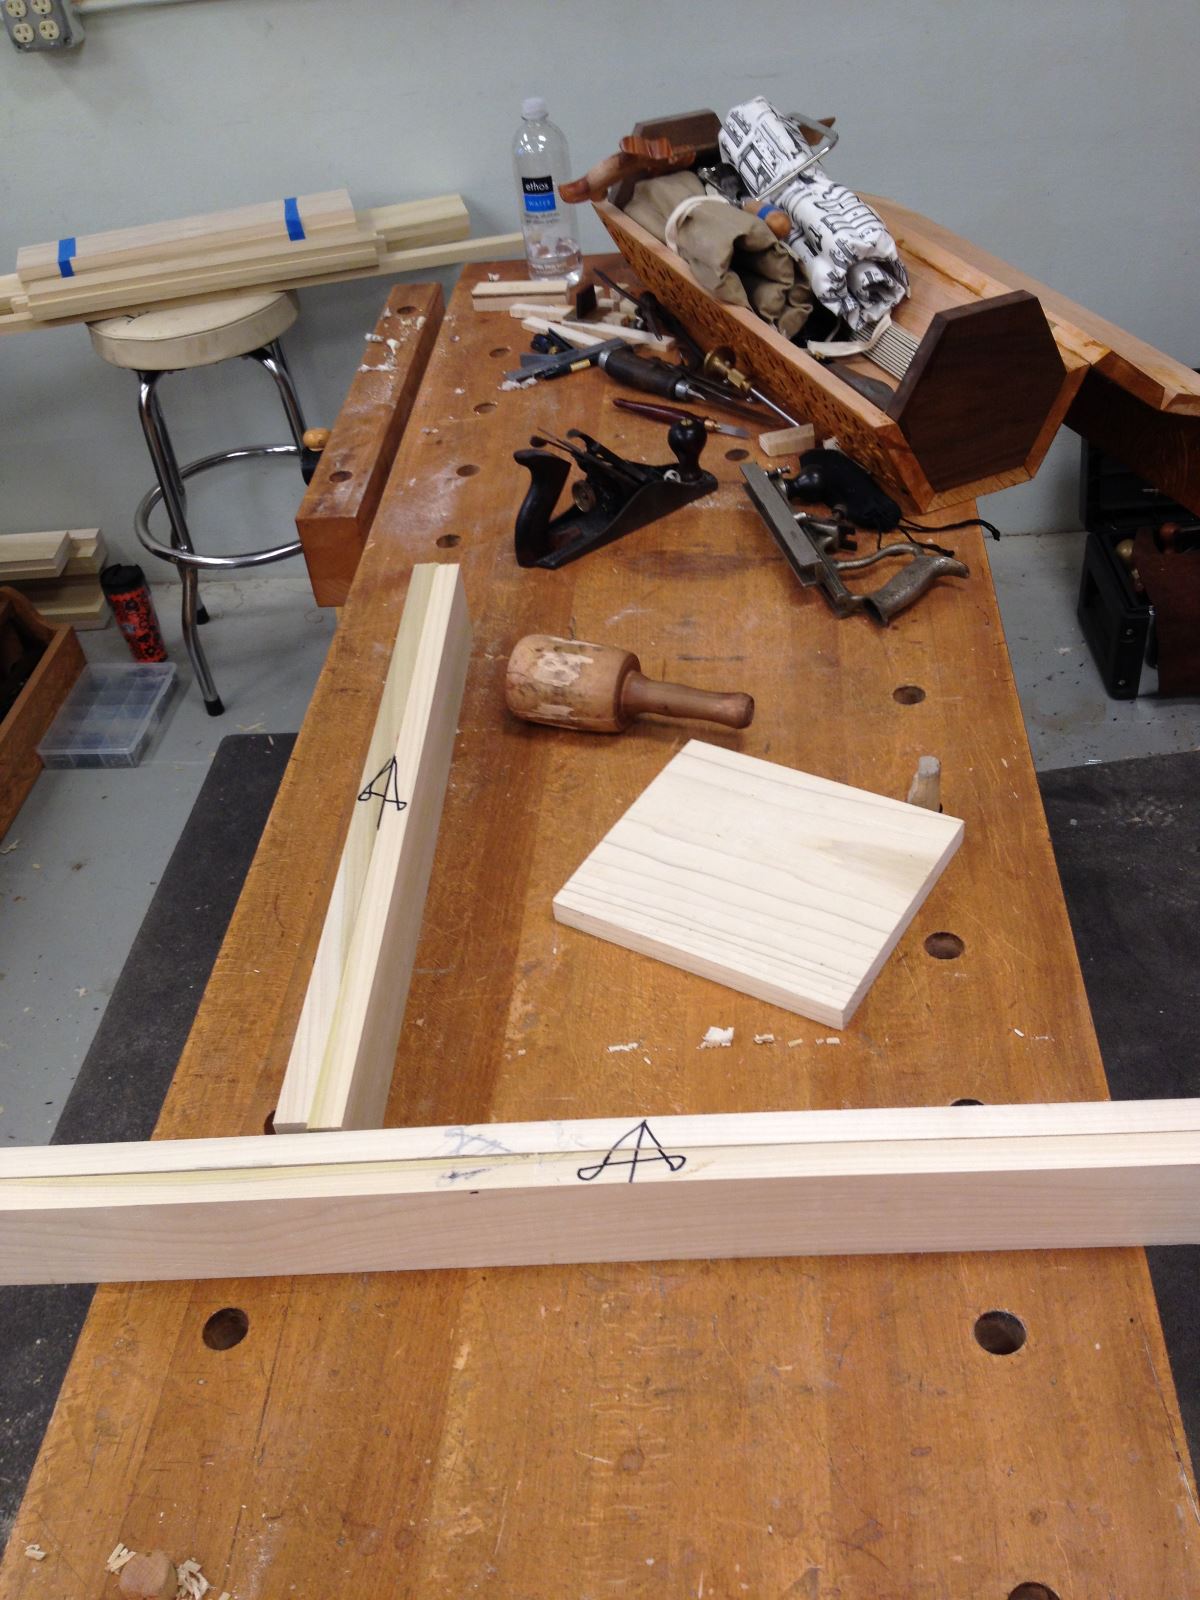
One of the single most important things I learned from this class was the “french” cabinet makers mark. Once I wrapped my head around it, I found it to be very useful.
Jim Tolpin dropped by at lunch one day to give a bonus lecture on the “By Hand and By Eye” subject matter. I’ve decided that Jim Tolpin is kind of like Obi Wan Kenobi (from A New Hope naturally).

Great person, great teacher, and a very fun guy to go get drinks with.
Travelling Hexagon toolbox – Finished!
See Previous installments on this project here:
Part  1 - Part 2 - Part 3 - Part 4 – Part 5
Here are some glamour shots of the Hex toolbox where it debuted at the Port Townsend edition of the Anarchist Toolchest class by Chris Schwarz. Â It was a great time and I’ll post about that next.

Hexagonal Tool box closed
Hexagonal Toolbox with one flap open.
Hexagonal Toolbox all the way open.
All in all I’m pretty pleased with how it turned out, and how it was to work out of at the class.
Badger
Travelling Hexagon toolbox – Part 5
See Previous installments on this project here:
Part  1 - Part 2 - Part 3 – Part 4
It was buckle down and get this done time in the Badger Woodworks shop, so I didn’t take a lot of pictures of the final stages. Â If there had been it probably would have been me looking confused and sweating a lot. Â I did all right in my high school geometry classes, that’s not the issue here, it’s more of how long ago those classes were. Â I had to puzzle my way through some basic “math” on the final stages of the box was mostly victorious. Â It didn’t help that I was rushing to finish, and it was pretty dang hot outside making the “workshop” aka small section of a crowded garage pretty stuffy.
Regardless of those massive challenges (first world problems for sure) I was able to persevere and triumph. Â For varying definitions of the word “triumph”.
Angled edges planed on the side panels.
After lots of working planing, and copious use of a drawknife at the end, I was able to get the angle set on all the boards. Â At this point I discovered a potential issue. Â The thickness of the boards were not even. Â This meant the inside width post chamfer was not consistent and would cause issues with the hexagon shape. Â I briefly flirted with the idea of planing the four thickest boards down, but I was running short of time (and daylight) so I opted to use my moving filister plane to just do the ends. Â I struggled a bit with getting it even and consistent (see a later blog post on how Chris Schwarz helped me fix this) but eventually got it roughed in enough to move on to the hexagon.
At this point I was I tired of stepping on shavings, and swept up a bit. I was tempted to call the kiddo down to get pictures of him jumping in the shavings like a pile of leaves (it was that big) but I didn’t want to lose him.
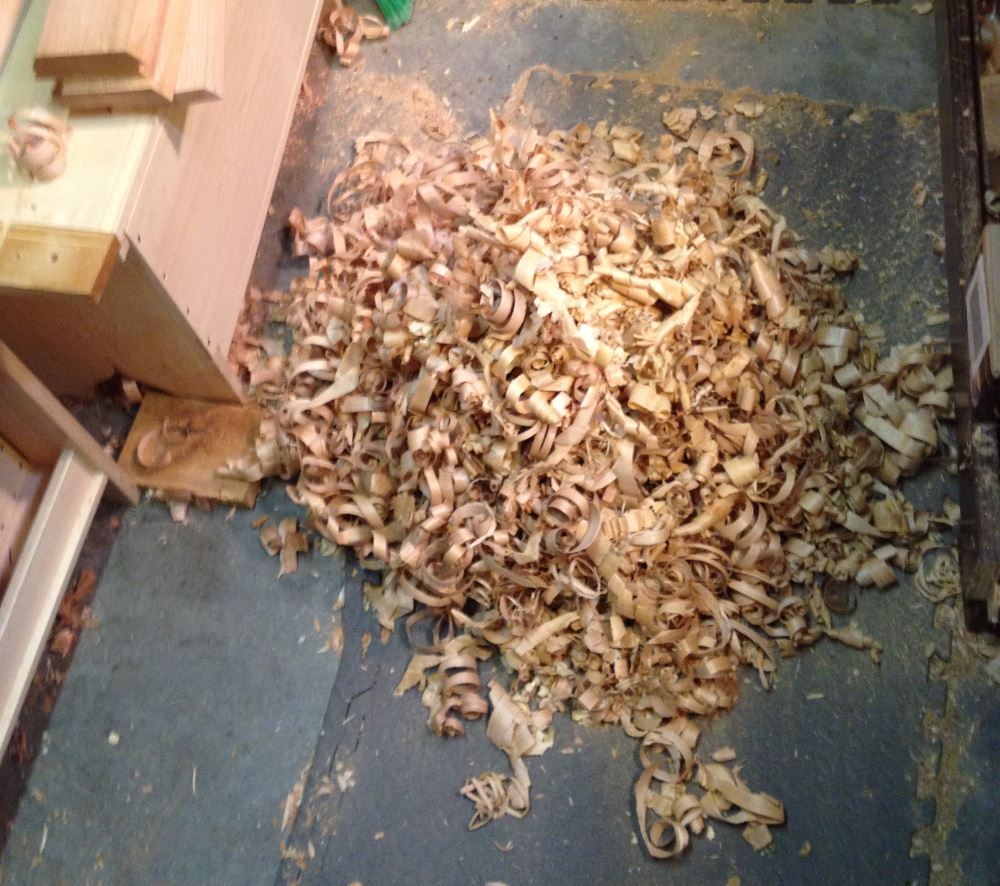
Big pile of Alder shavings.
To make the end pieces I measured all the inside widths of my boards to find the minimum width. Â They were close, but I knew I would have to get them even, fitting this to the smallest one. Â Then I took this length, set my compass to this and drew a circle on a manila file folder which I have a big old stack of from a previous job. (They are really handy for making templates and stuff in the shop.)
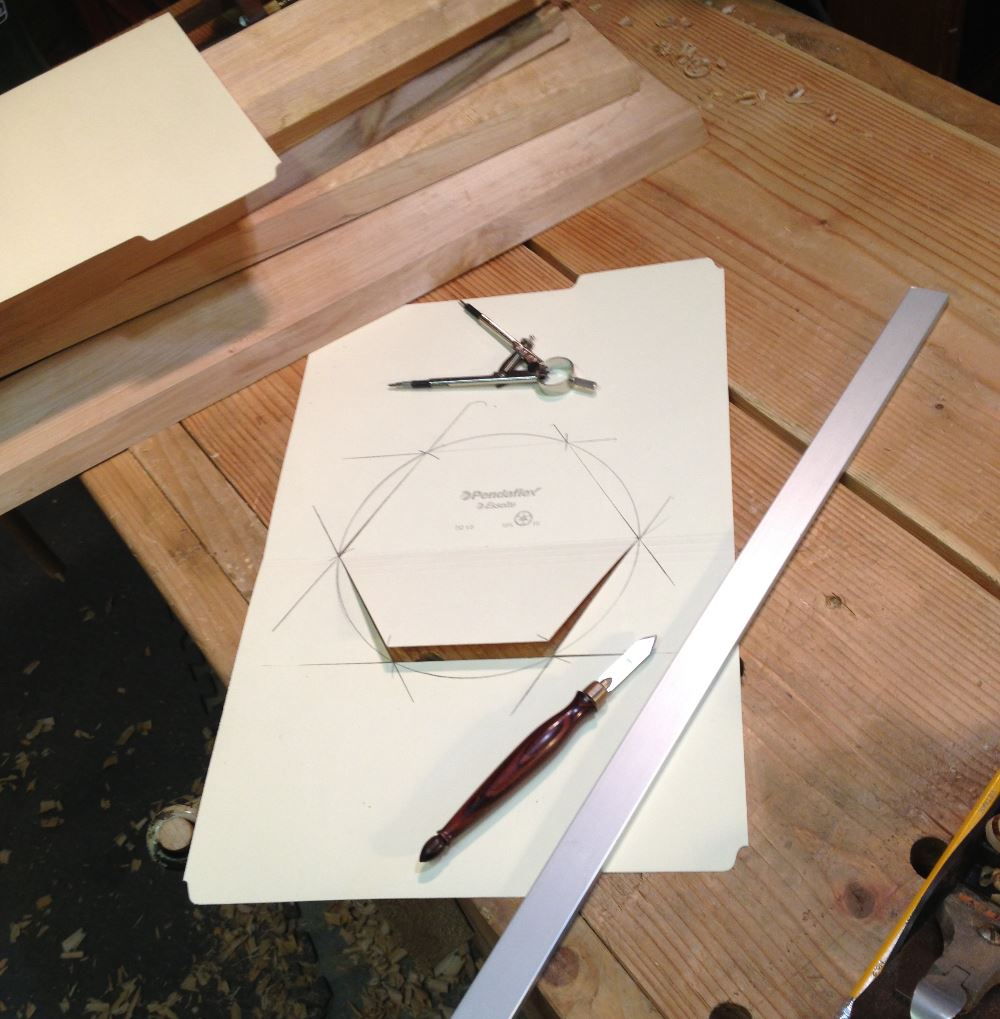
Hexagon template.
Now that I have this, and double checked it against the work as best I could, I looked around the shop for some wood that I could use. I had a small piece of walnut board left over from a previous project, and decided to use it. Â I had planned on using my pine boards, but it felt like a crime to cut into these 12″ boards for a small project. Â The walnut was really close to the width, which meant less sawing too, so there you go… lazy wins again!
I cut the hexagon on my bench with a crosscut saw plenty wide of the line, and planed it flat taking real care to watch the grain direction on the four sides that were angled across the grain. Â I left the whole hex a bit proud of the line so I could fit it later.

Walnut Hexagons for the end caps.
At this point I started laying the ends to the work on panel at a time. It was getting late, so I didn’t take any pictures past this point because I was in a hurry. Â I started by laying it to the bottom board (the one with out carving, and fit the width of the face to the inside edge. Â This I nailed down with cut nails after holding it up with wooden clamps. Â From here I worked my way around the back edge, fitting each board to the edge of the corresponding hexagon edge and adjusting the long edge to fit each time. Â With varying degrees of success. Since it was late, and I was rushing I opted to skip glue and just use nails so I could revisit this later if I needed to. Â After I nailed the two bottom carved panels forming the bottom of the box, I moved onto the top.
In the Toolbox Book by Jim Tolpin, he used a leather strap around the outside. Â I didn’t want to cover my carving, so I opted for small brass hinges to connect the three top panels. Â It was a little tricky working with the angled faces but in the end it was simple matter of installing the hinges. Â The hardest part was fitting the three hinged panels to the bottom boards because it was tough to hold them up with everything falling over.
Then it was slap a coat of amber shellac, and go to bed for a really early wake up to get on the road to the Toolchest Class in Port Townsend.
I’ll post final pics in my next post.
Travelling Hexagon toolbox – Part 4
See Previous installments on this project here:
The deadline (self imposed) for this project is coming up, and I needed to make some serious progress this weekend. Â I’ve been busier than my normal level of insanely busy at work due to a “restructuring” that saw 50 people laid off, but my group got three additional people from other groups so I had to get them integrated and up to speed. Â So, extra levels of chaos at work and mental exhaustion means I didn’t get anything done last week like I wanted to.
Fortunately this weekend I had some clear space and an accommodating wife who sent me down to get it done. Â On Saturday I knocked out two complete panels as well started chamfering the edges for the hex shape.

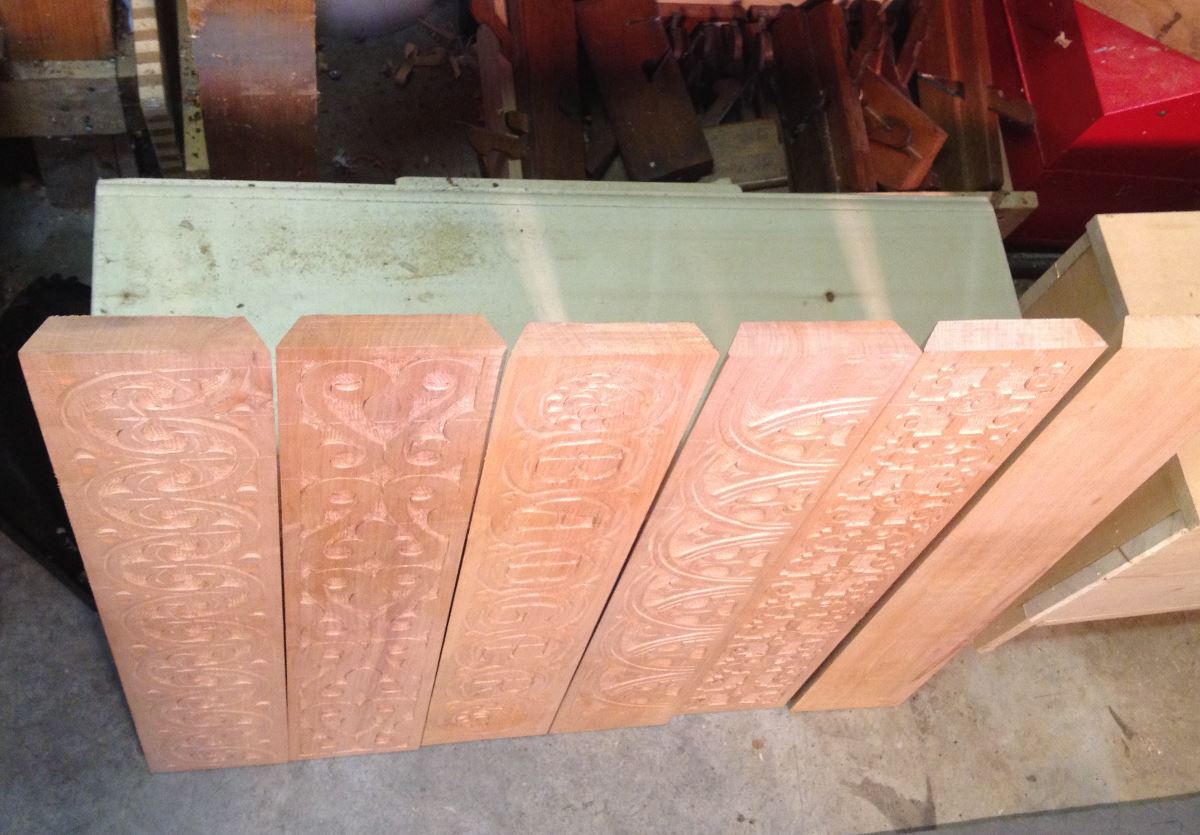
All five panels finished.
Here is a shot of the finished panels and the the sixth panel will be the bottom, and won’t get decorated.  The order completed is first on the bottom with most recent at the top.  I got more comfortable as I went, and feel like my first panel was the worst in term of ease and final product.  Starting at the bottom, they are arranged in order of completion.
The one with my nickname on it will be on top, and presented a unique challenge, lettering. Â I have never done anything like that before, and didn’t have a clear idea on how to do it. Â But, I kind of made up my letters based on a mish mash of times new roman, and some letters I saw carved on a chest from the 16th century. Â Turned out ok, I suppose.
The top pattern is totally new to me, and is from a partial pattern of a wainscot chair back that I had in my photo collection that I believe came from museum shot from Peter’s Blog. Â The pattern was pretty simple to layout with three of my collection of dividers, and I like how it came out. Â It works pretty well in the relatively soft Alder I’m working in, since small details can be fragile in this wood.
Last night I had gotten the 30 degree bevel planed on three panels so far, but that was enough for one day. Â Today I got back to work on the bevels, and thankfully for my sore back learned a new lesson.

Don’t forget the old tools.
I was spending 30-40 strokes with the #5 fore plane set very aggressive. Â I was working up a serious sweat, and my back is sore from yesterday. Â I thought there has to be a better way, and then I remembered my old drawknife. I bought this back in the beginning of my woodworking adventure, and never really found a use for it. Â Today I learned the lesson, don’t forget the old tool. Â The drawknife takes aggressive cuts easily, and I was able to hog off the waste in a few dozen strokes with a lot less effort. Â Then a few passes of the #5 and #7 planes and done.
I think I can get this done in time to take it to the Tool Chest class out in Port Townsend. Â I’m hoping to use it to carry all or most of my tools I want to take to the class with me. Â We’ll see how many fit once I’ve actually got it together.